
The Office
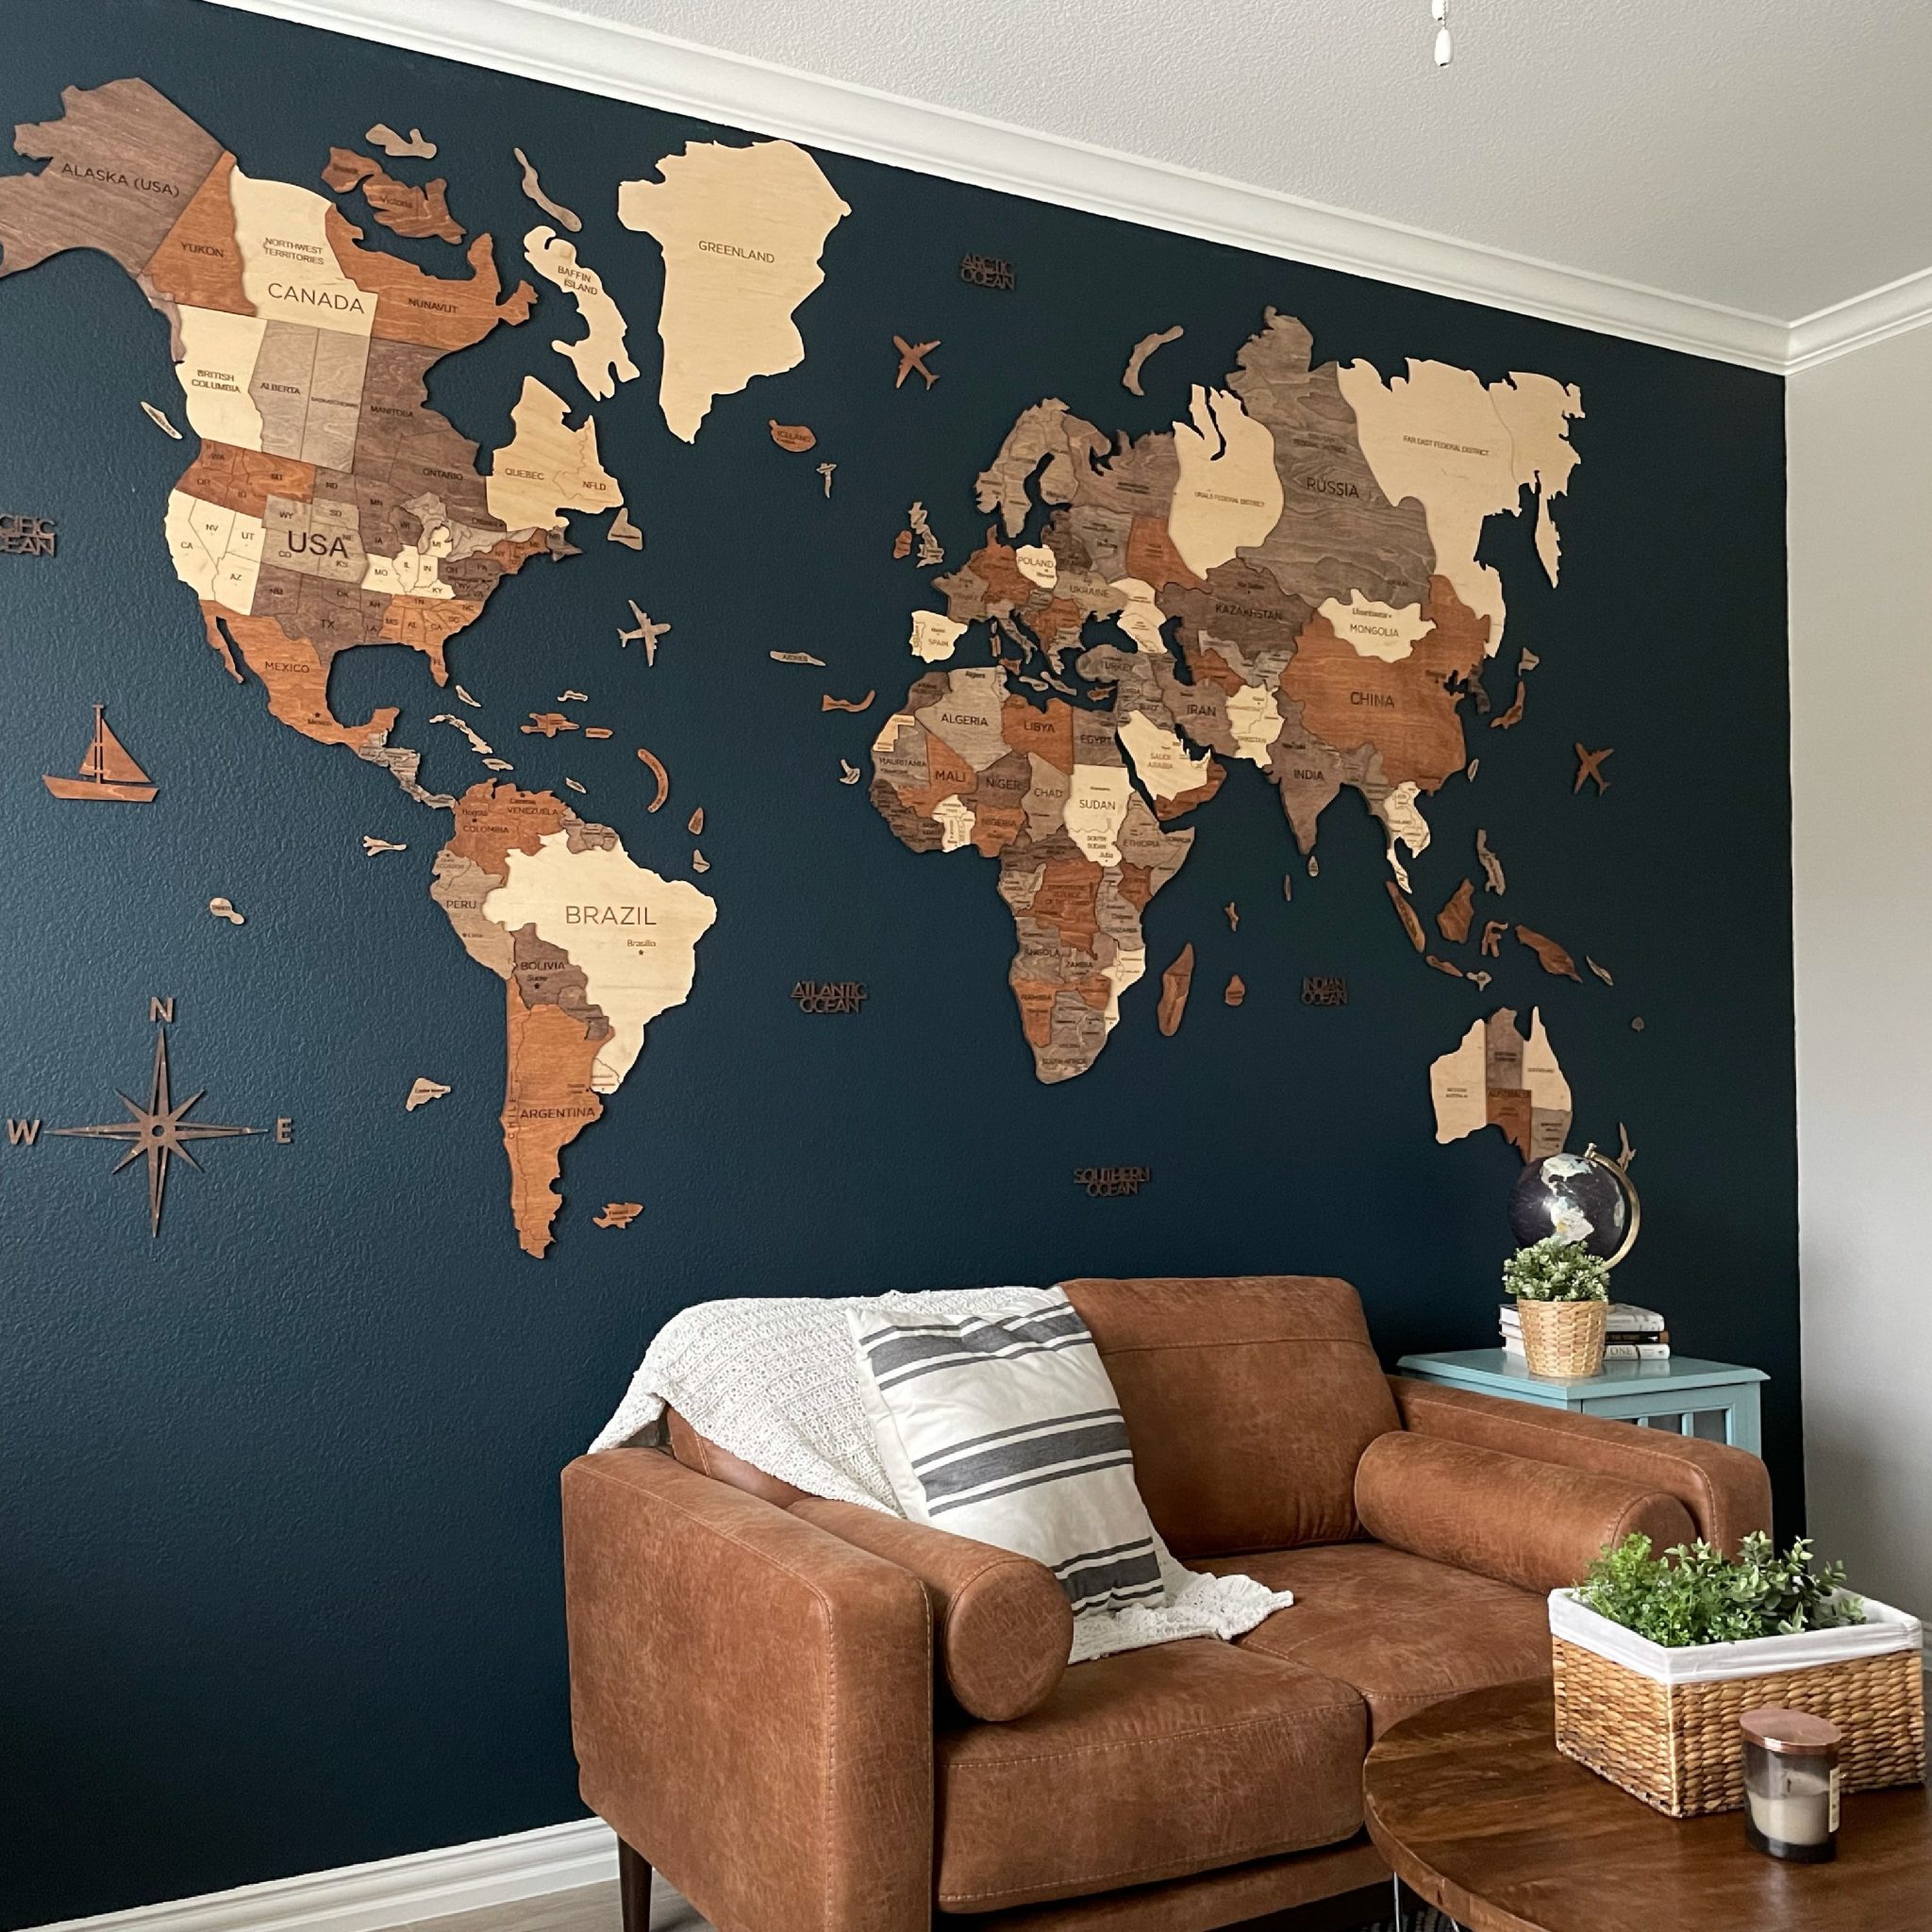
My husband and I both love to travel and have big dreams of traveling abroad one day again soon (once the COVID pandemic is behind us). When we moved into our new house we had a huge blank wall in the office that needed something. After looking at various ideas for a few weeks, I saw an ad on Instagram for a giant wood map wall and knew I had to have it. The company, Enjoy the Wood, is a Ukrainian based company and they make the coolest 3D wood world maps. We have had so many compliments on this world map accent wall since we finished it and the coolest part is, it wasn’t even difficult to do. That’s a DIY win in my book.
Painting the Wall
The first thing I had to do was to paint the wall. Our wall was painted Agreeable Grey from Sherwin Williams. I am all about contrast so I couldn’t wait to spice things up once we moved in. In my head, the map just wouldn’t look right on anything other than a blue background. I really wanted the wall to grasp the full effect of the water and the continents all in one just as it would appear on a globe.
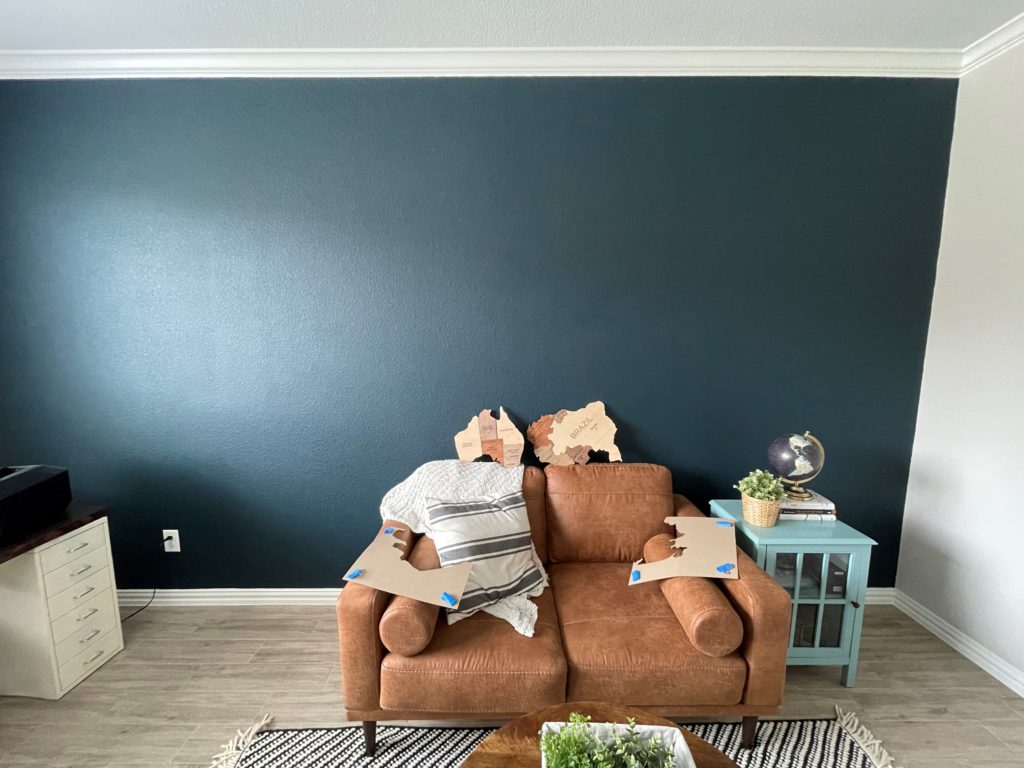
After searching through paint samples at Lowe’s, (my typical go to for any Sherwin Williams paint), and coming up short, I finally made the trip to the actual Sherwin Williams store. There I found the paint color I landed on: Dark Night by Sherwin Williams. I loved the depth and richness of the color. It has the perfect amount of dark blue while flirting with some deep green undertones.
Hanging the Map
Once the wall was painted, the fun really began. The Enjoy the Wood world map comes with tiny little adhesive stripes, but if you have textured walls, they will not stick. Spare yourself the time and just brad nail the pieces to the wall from the beginning.
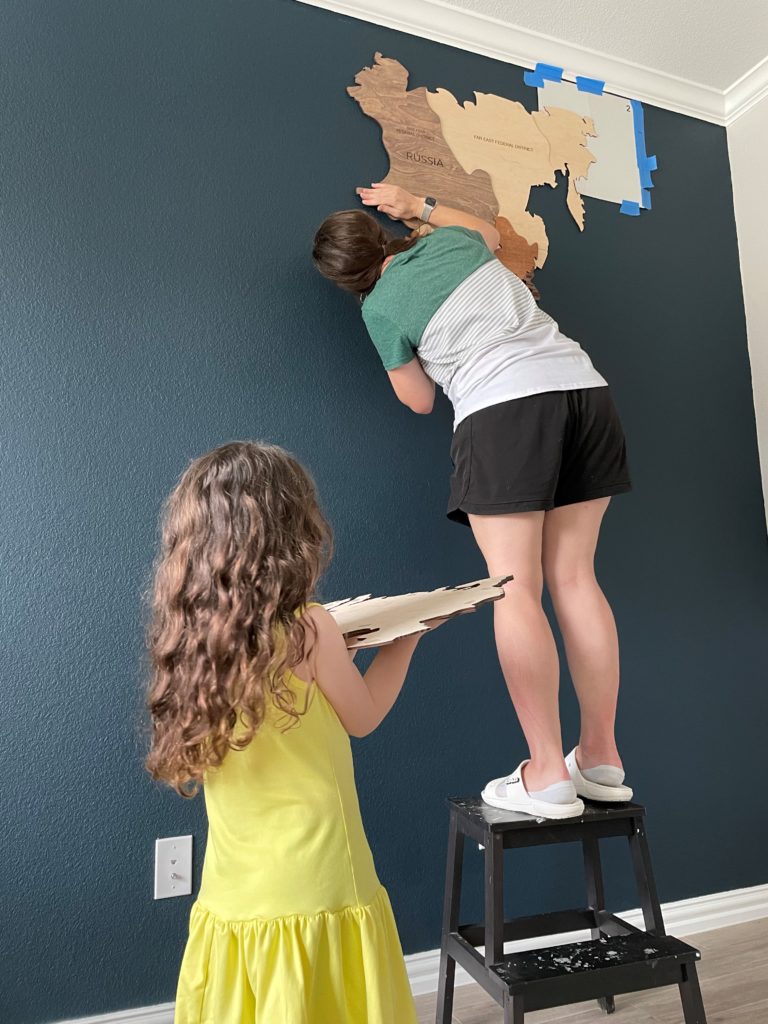
To attach the map the first thing my husband and I had to do was put stencils in each corner to assist with placing the first pieces (these come with the map). From that point forward, it was like filling in a giant wall size puzzle.
I love how the map turned out. Typically, I take the chance to cover up a textured wall at the first chance I get, but with this project, I actually love the texture. I feel like it resembles the waves of the ocean. For this project the texture just works.
Overall I would rate this project a 2/10 on the difficulty scale. It took us just a few short hours (once the wall was painted) to adhere the map and the final result is simply amazing. The office is my new favorite room in my house.