Yes. You read that right. I am about to tell you one of the easiest ways I have discovered to breathe new life into a thrift store vase and it might not cost you anything at all. Chances are, you have the supplies you need sitting right in your spice rack (and maybe also in your garage).
Supplies needed
- Jar of sample paint – 7.25 fl oz (I used a Sherwin Williams sample that I already had sitting in my garage).
- Baking soda
- Foam paint brush
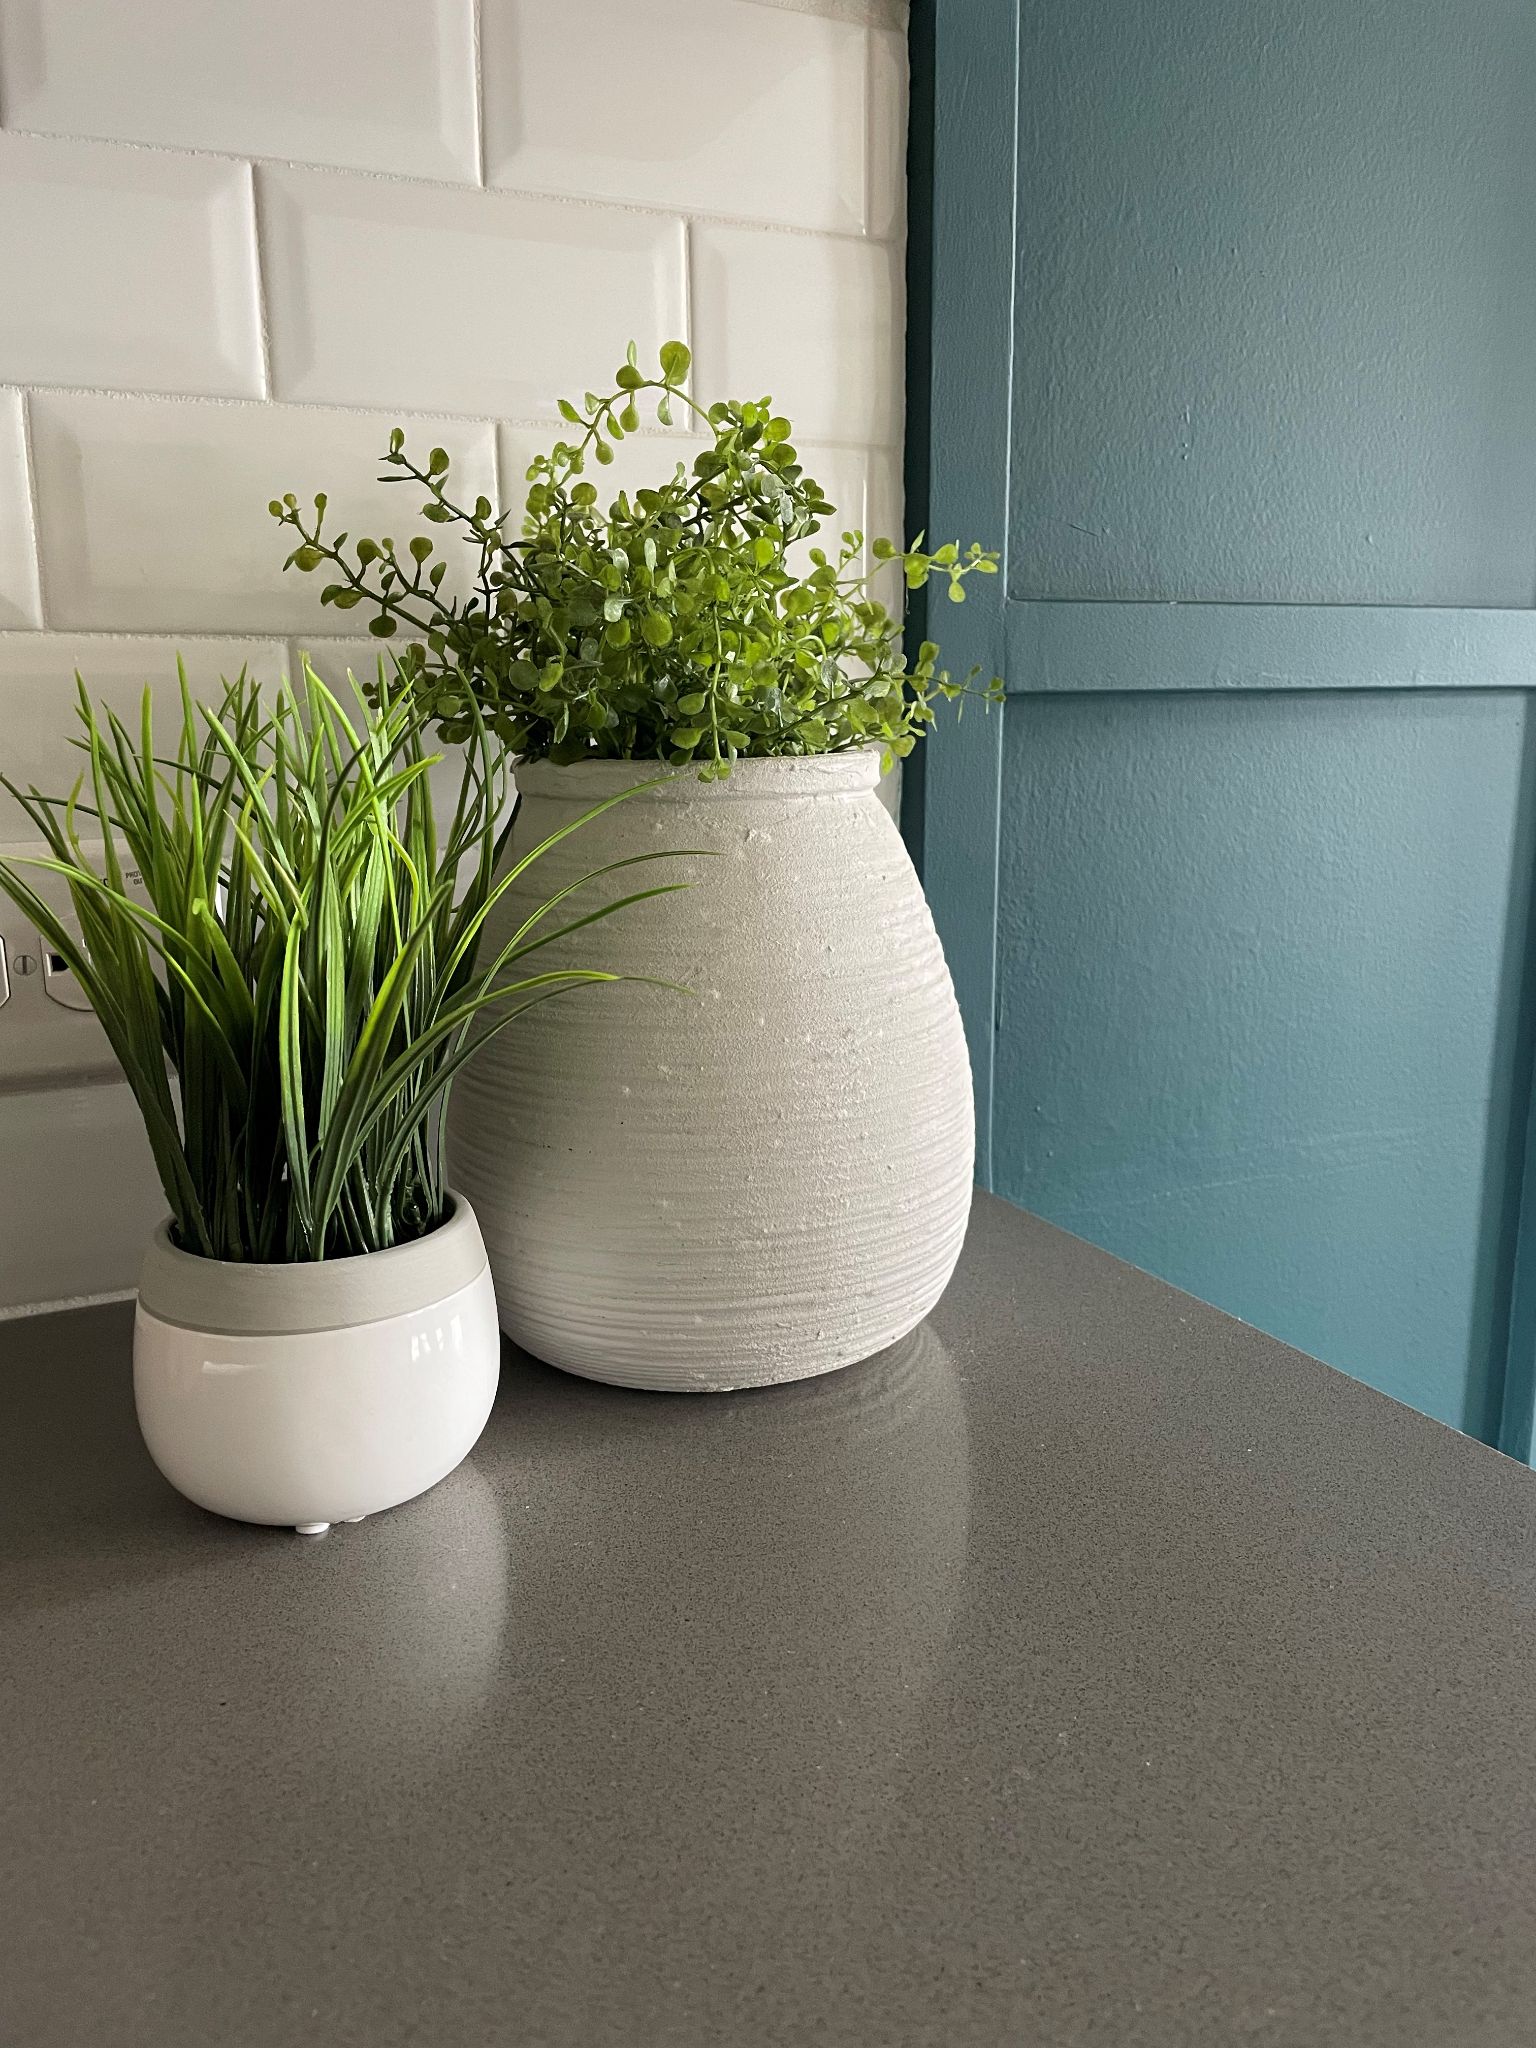
A few weeks ago I was walking around a local thrift store and a vase caught my eye that had some interesting features but I hated the color and the glossy finish. My creative juices started flowing and I knew I had to try this baking soda trick I had seen on the internet.
When it comes to home decor, I love to incorporate texture and I knew I would be able to achieve the textured look I wanted by adding baking soda to the paint. Some places on the internet will tell you to keep a certain baking soda to paint ratio, however, I like to think of it as more of an art rather than an exact science. For a heavily textured look, add more baking soda. For a less textured look, less is more. I also add a small amount of water in order to get the consistency of the paint to be pancake batter-ish so that it goes on evenly.
The Process
Once the paint was the right consistency, I began painting the vase. In total I applied three coats allowing each coat to dry completely before applying the second. Each coat took approximately an hour to dry. So for less than $10 and a half days’ work, I had a beautifully upcycled vase to display on my kitchen counter and I couldn’t be more satisfied with how it turned out.

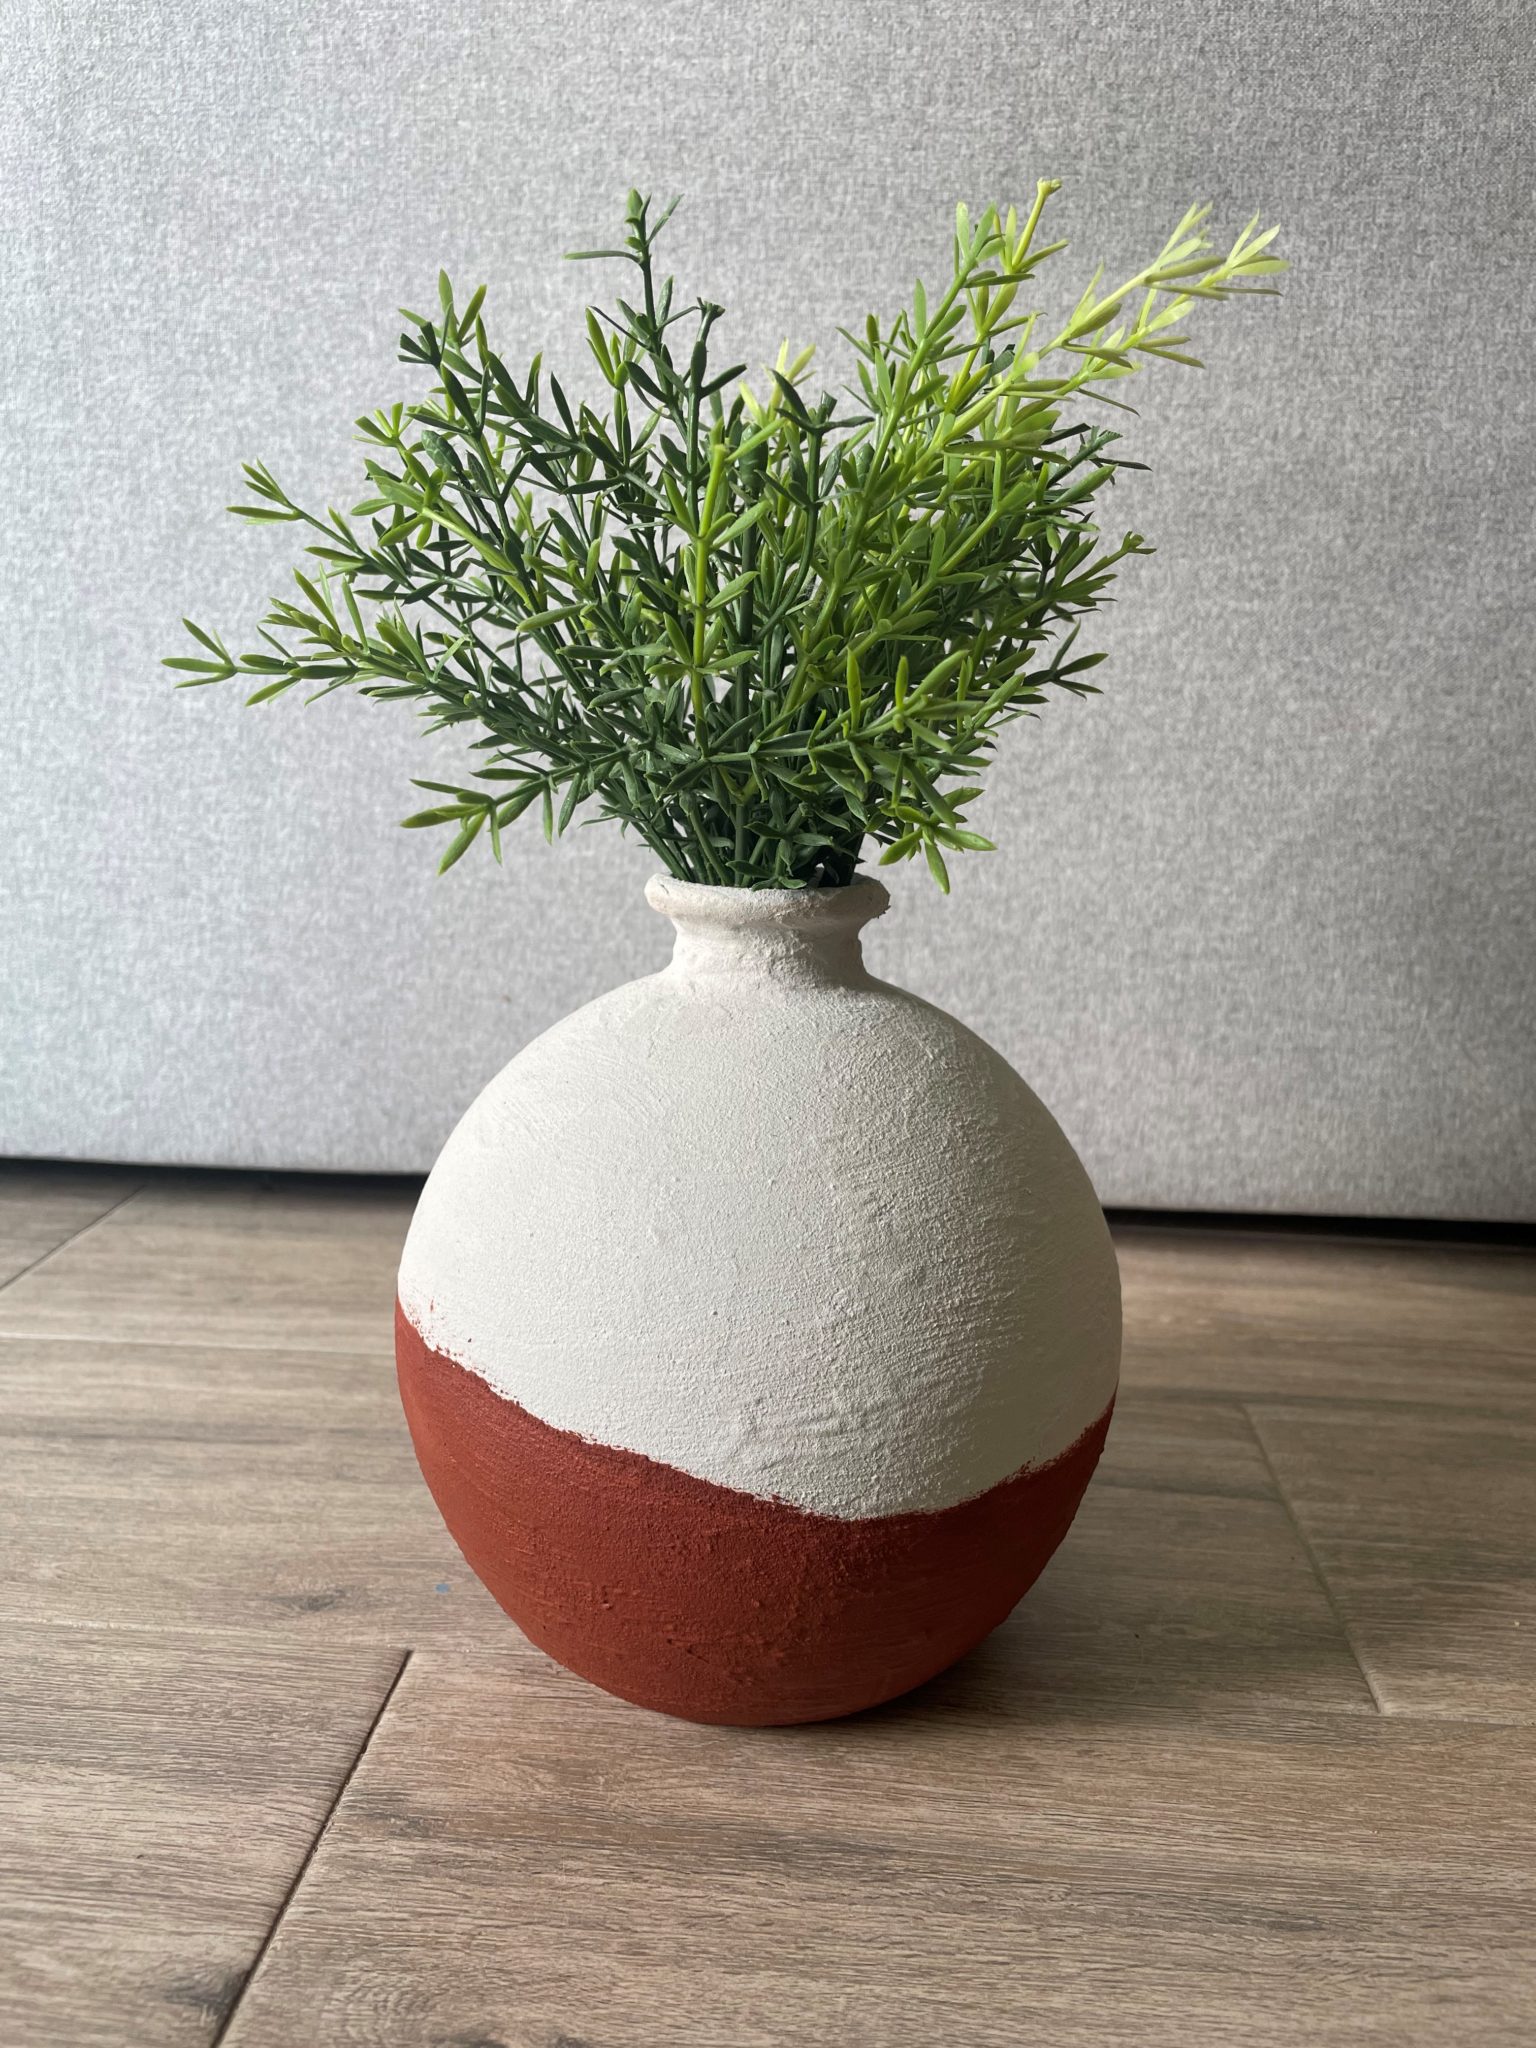
For the two tone vase look, I followed the same steps as above but took it one step further. After the white paint had dried, I mixed up baking soda into some acrylic paint (I used the Folk Art brand from Walmart.) and added a splash of water to get the right pancake batter consistency. I painted the lower half this beautiful Pueblo color. I wanted to make it feel as organic as possible so I opted for a curved paint line rather than a perfectly straight line all the way around. It turned out beautifully and is the perfect addition to my bedroom décor.
Happy DIY’ing
Xoxo Megan