
Learning to Leave My Comfort Zone
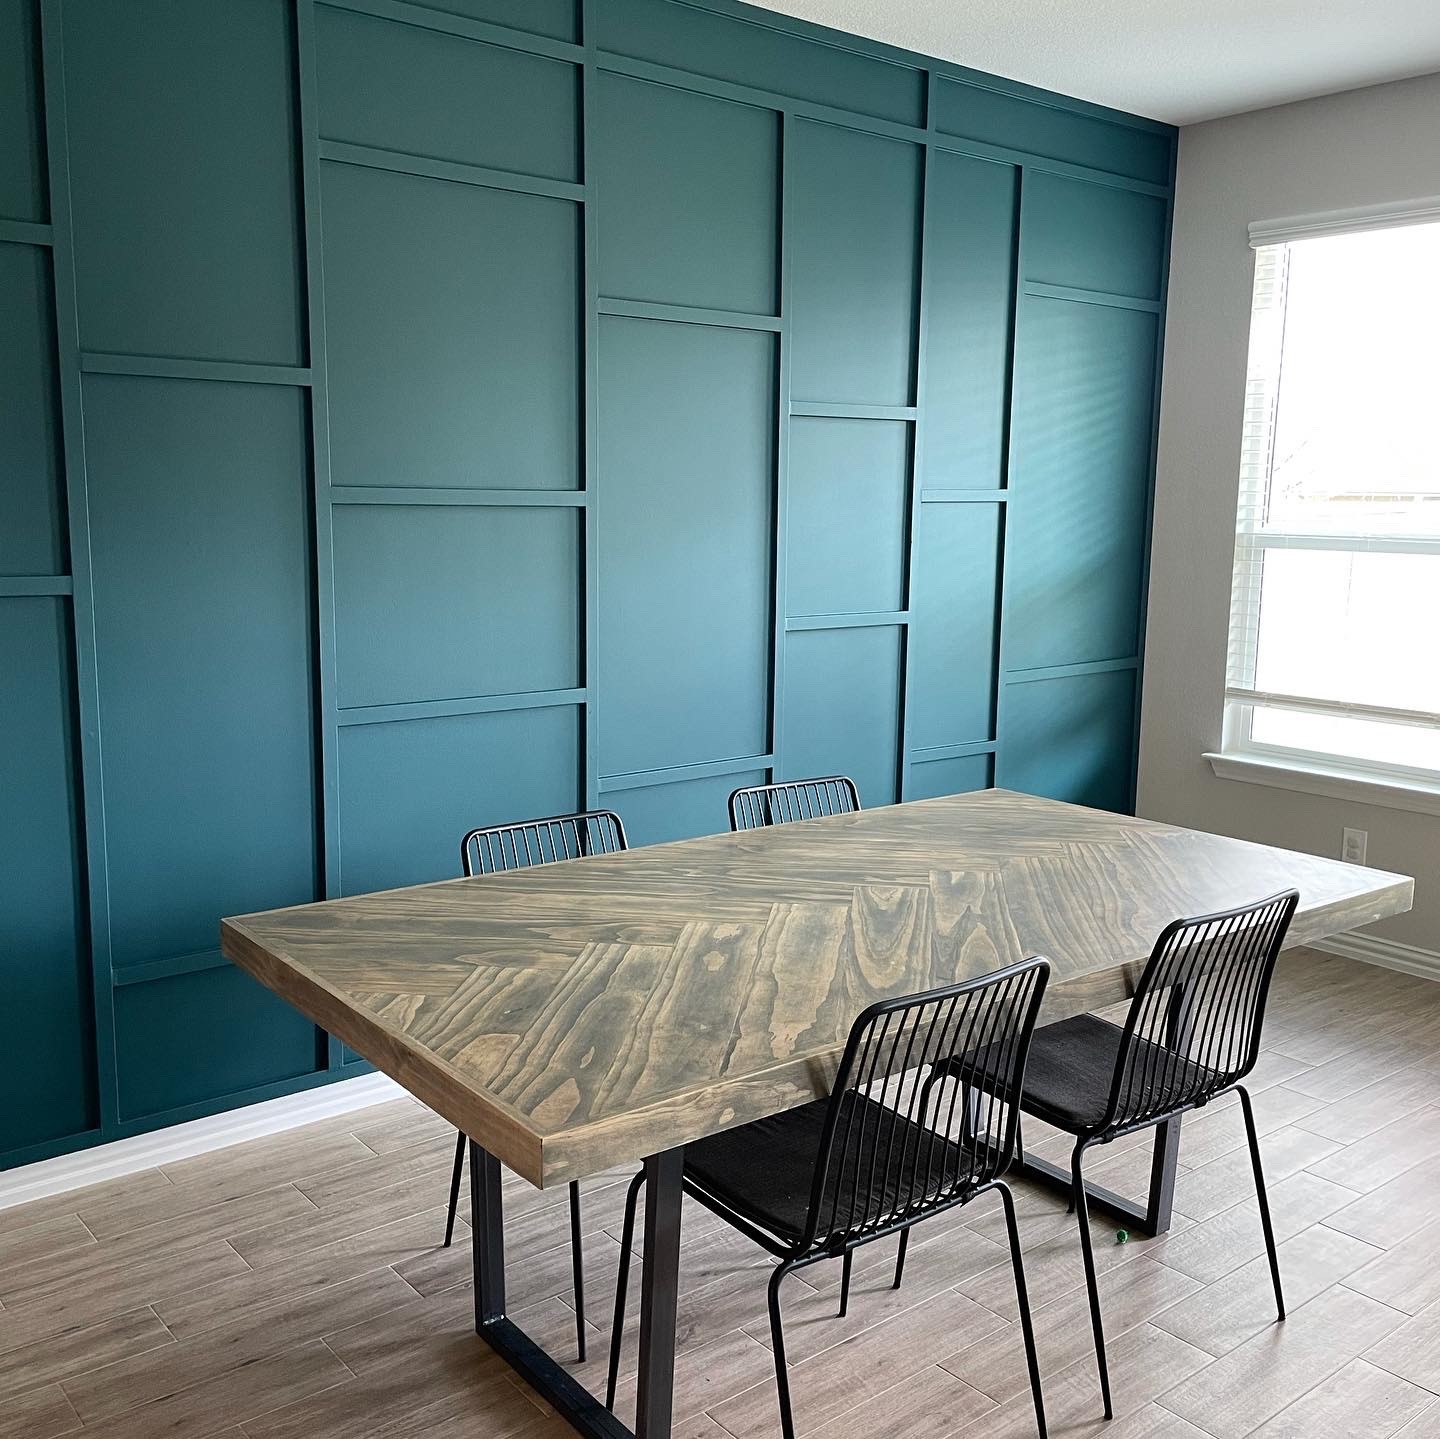
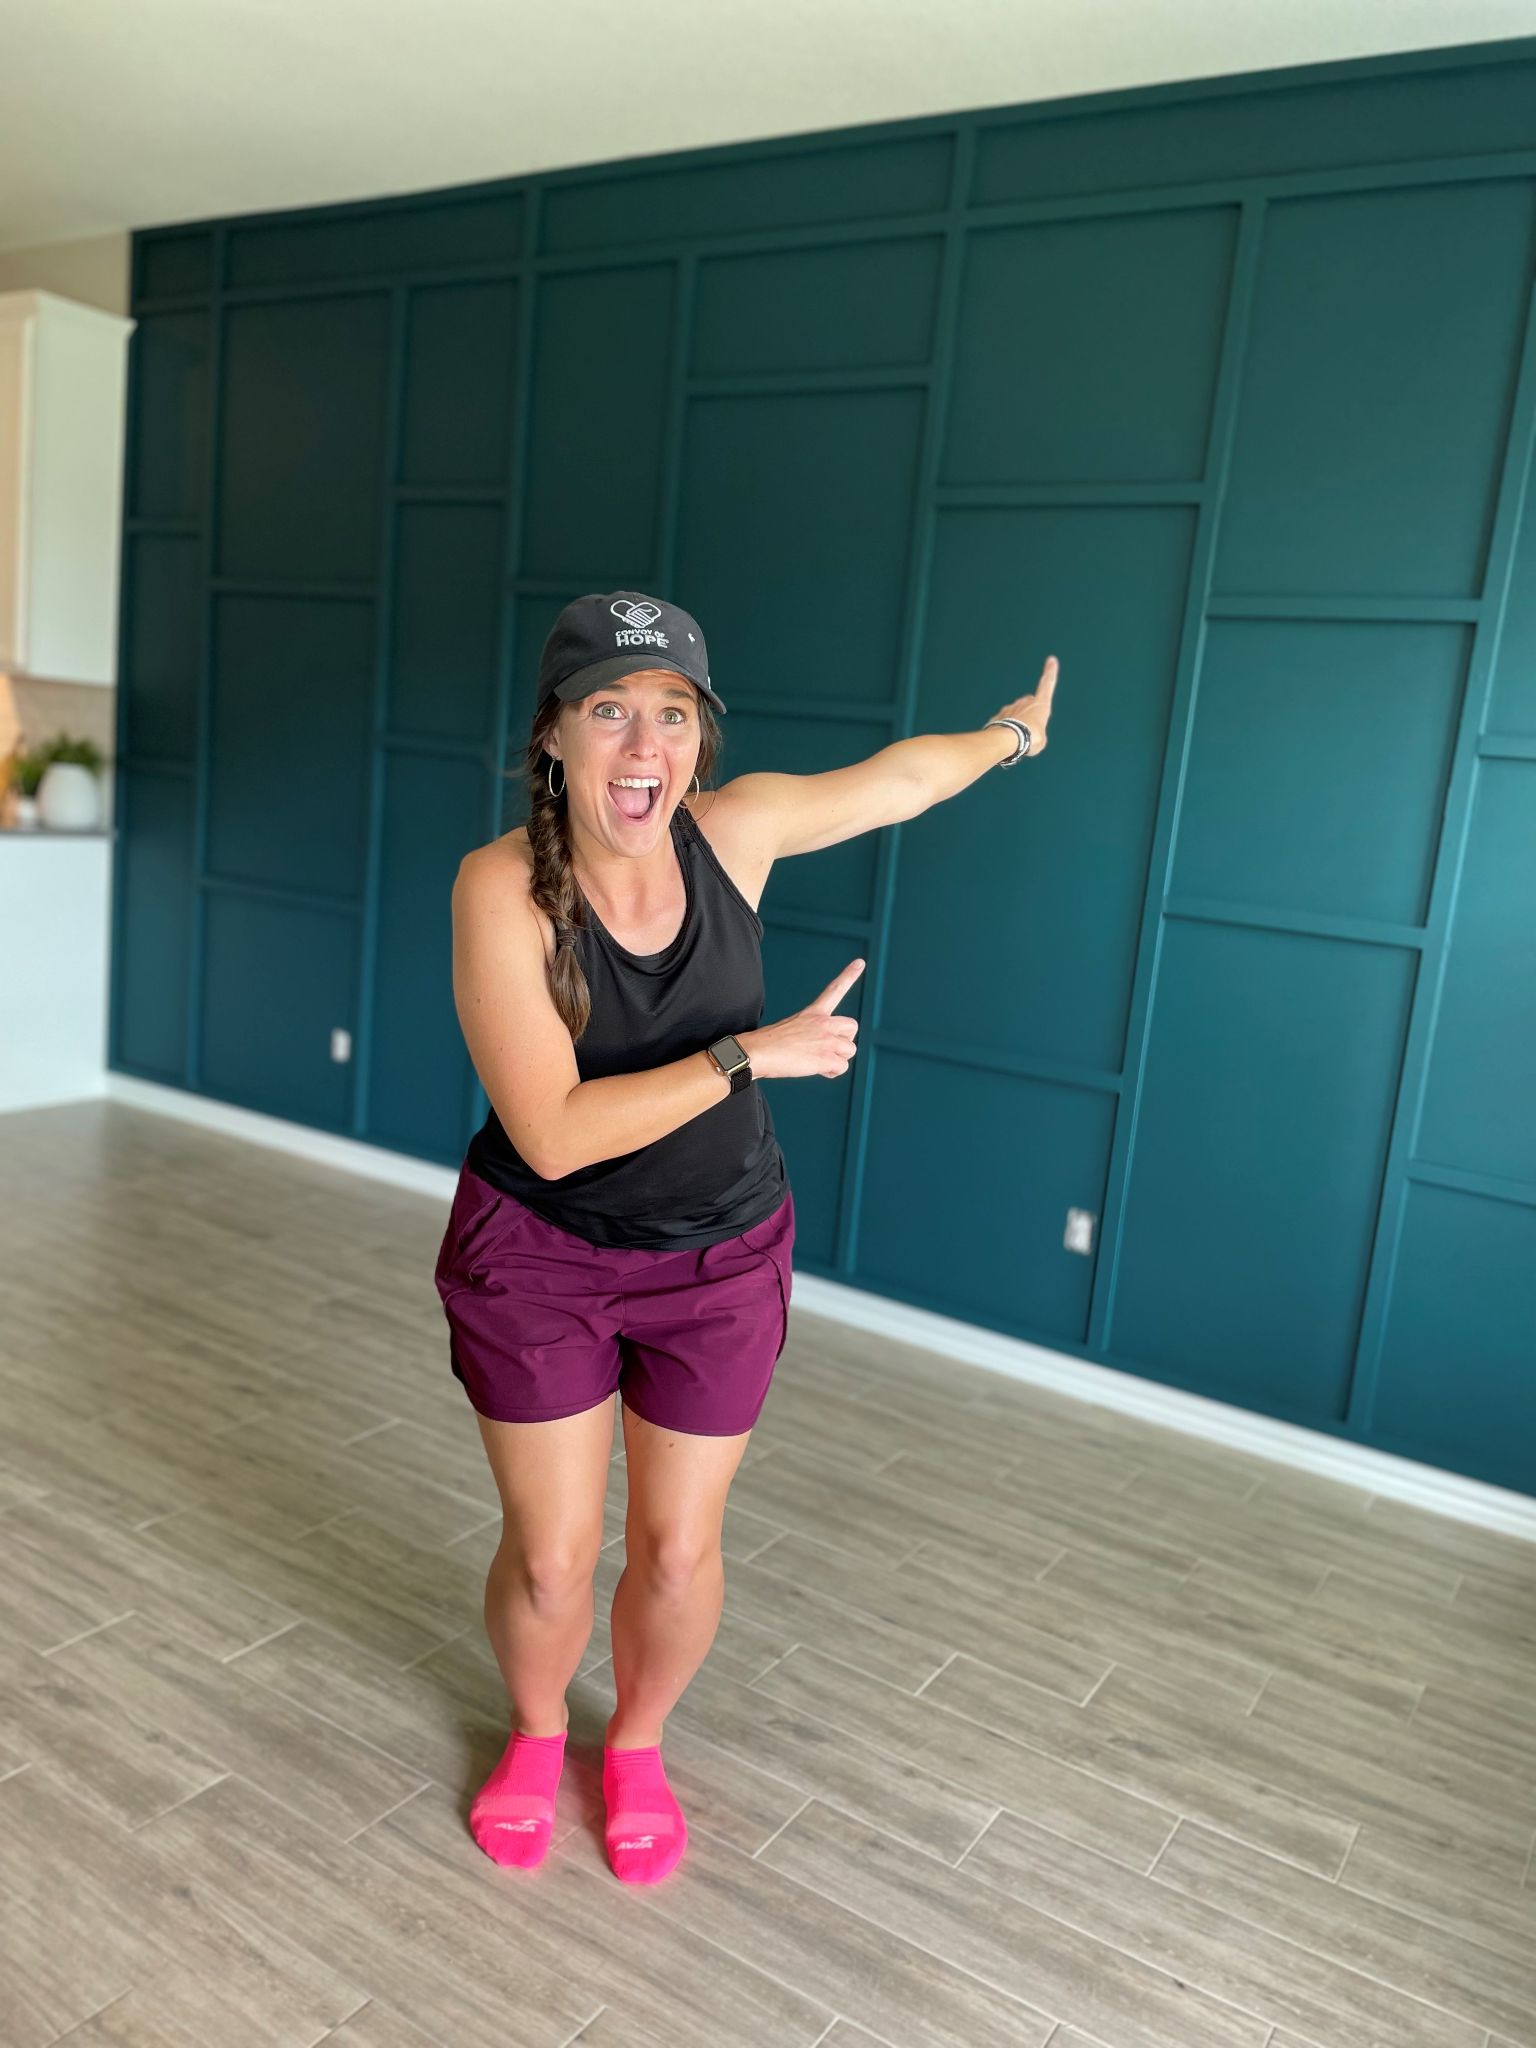
Who doesn’t love an accent wall? Growing up I was never one to take a lot of risks and preferred to play it safe. However, with this project I jumped way out of my comfort zone. I am honestly not sure what got into me but I am so glad that I decided to take the project on (as daunting as it was from the outset).
This board and batten wall turned out even better than I thought it would, which is fantastic especially since I made a critical error early on and had to redesign the entire thing after I had already started. Full disclosure, this was the first wall I have ever built. Do you want to know something even more mind blowing? I had NEVER used a power tool other than a drill before this project. Let that encourage you. I was determined to build this and I believed that I could and consequently the final result is pretty awesome.
Covering Textured Walls
The walls in my house are heavily textured and I knew I wanted the board and batten wall to have a smooth surface. After weighing my options, I determined that I would cover the wall texture with hardboard rather than a skim coat over the entire 17×9 ft wall.
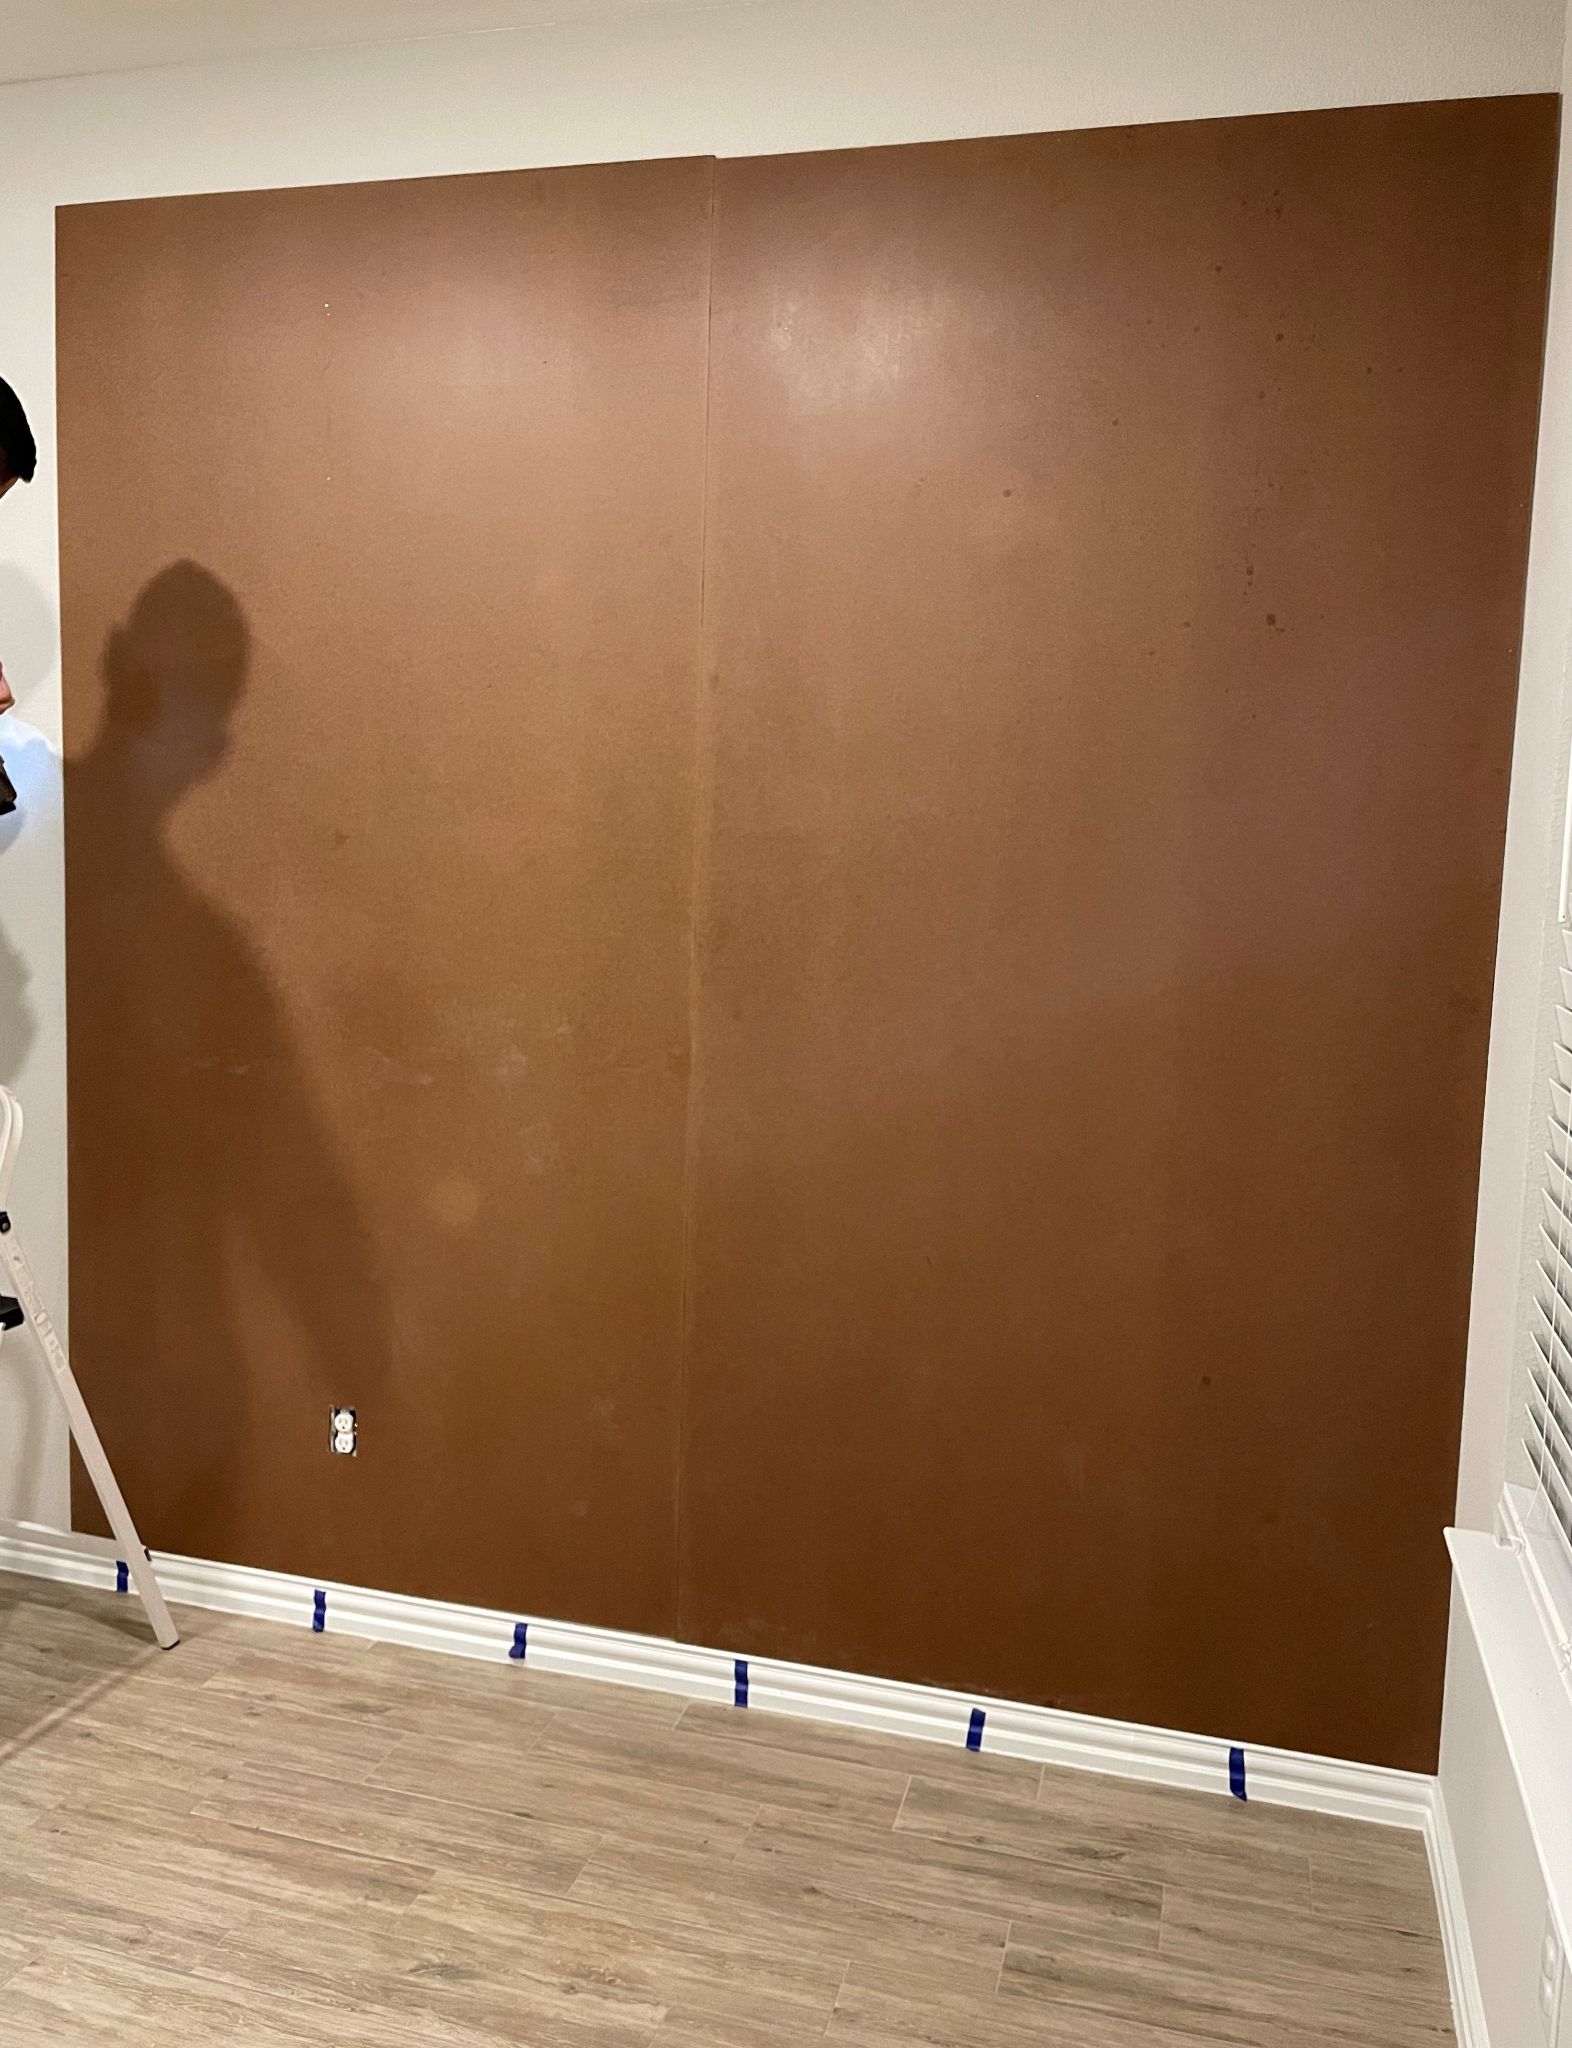
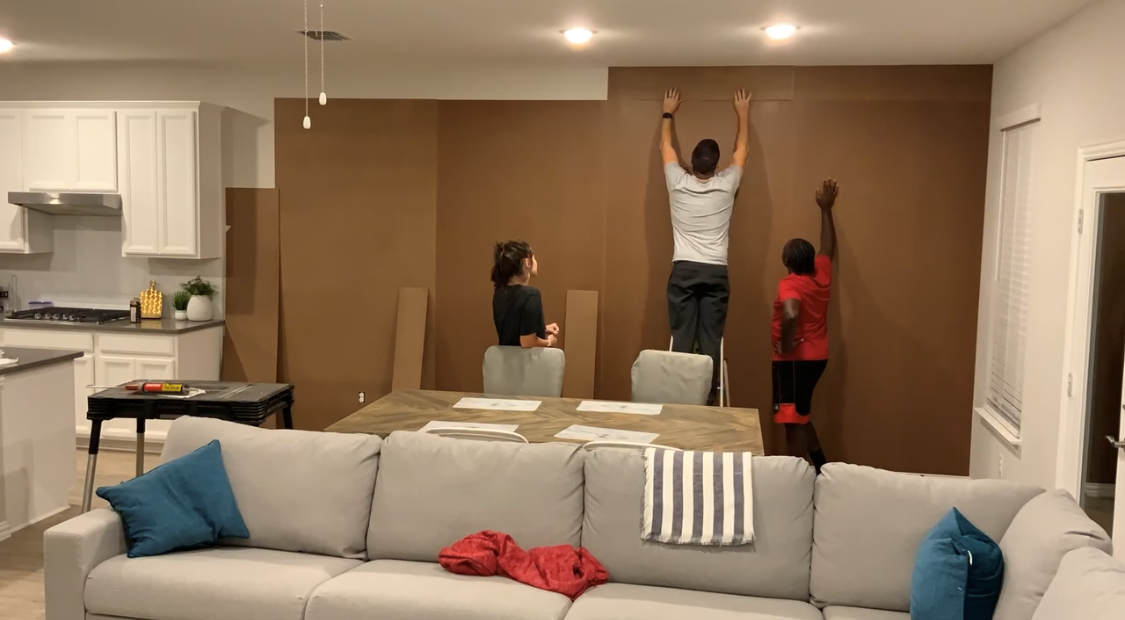
Since I have 9ft ceilings, I knew I would have to make some additional cuts with the hardboard to ensure the whole wall was covered. I recruited my husband (and his friend) to help me with this part because making irregular cuts (our ceiling isn’t completely level) seemed like too big of a challenge at the time.
Filling the Seams
The next step was to fill in the seams where the two pieces of hardboard met. This was my critical error. I used silicone caulk to fill the seams thinking it would allow for more give as my house settled. What I learned is that while silicone caulk works great for angled areas, it does not work well on flat surfaces. Inevitably, I discovered that it was nearly impossible to sand off the excess and get a completely flat surface after covering the seam.
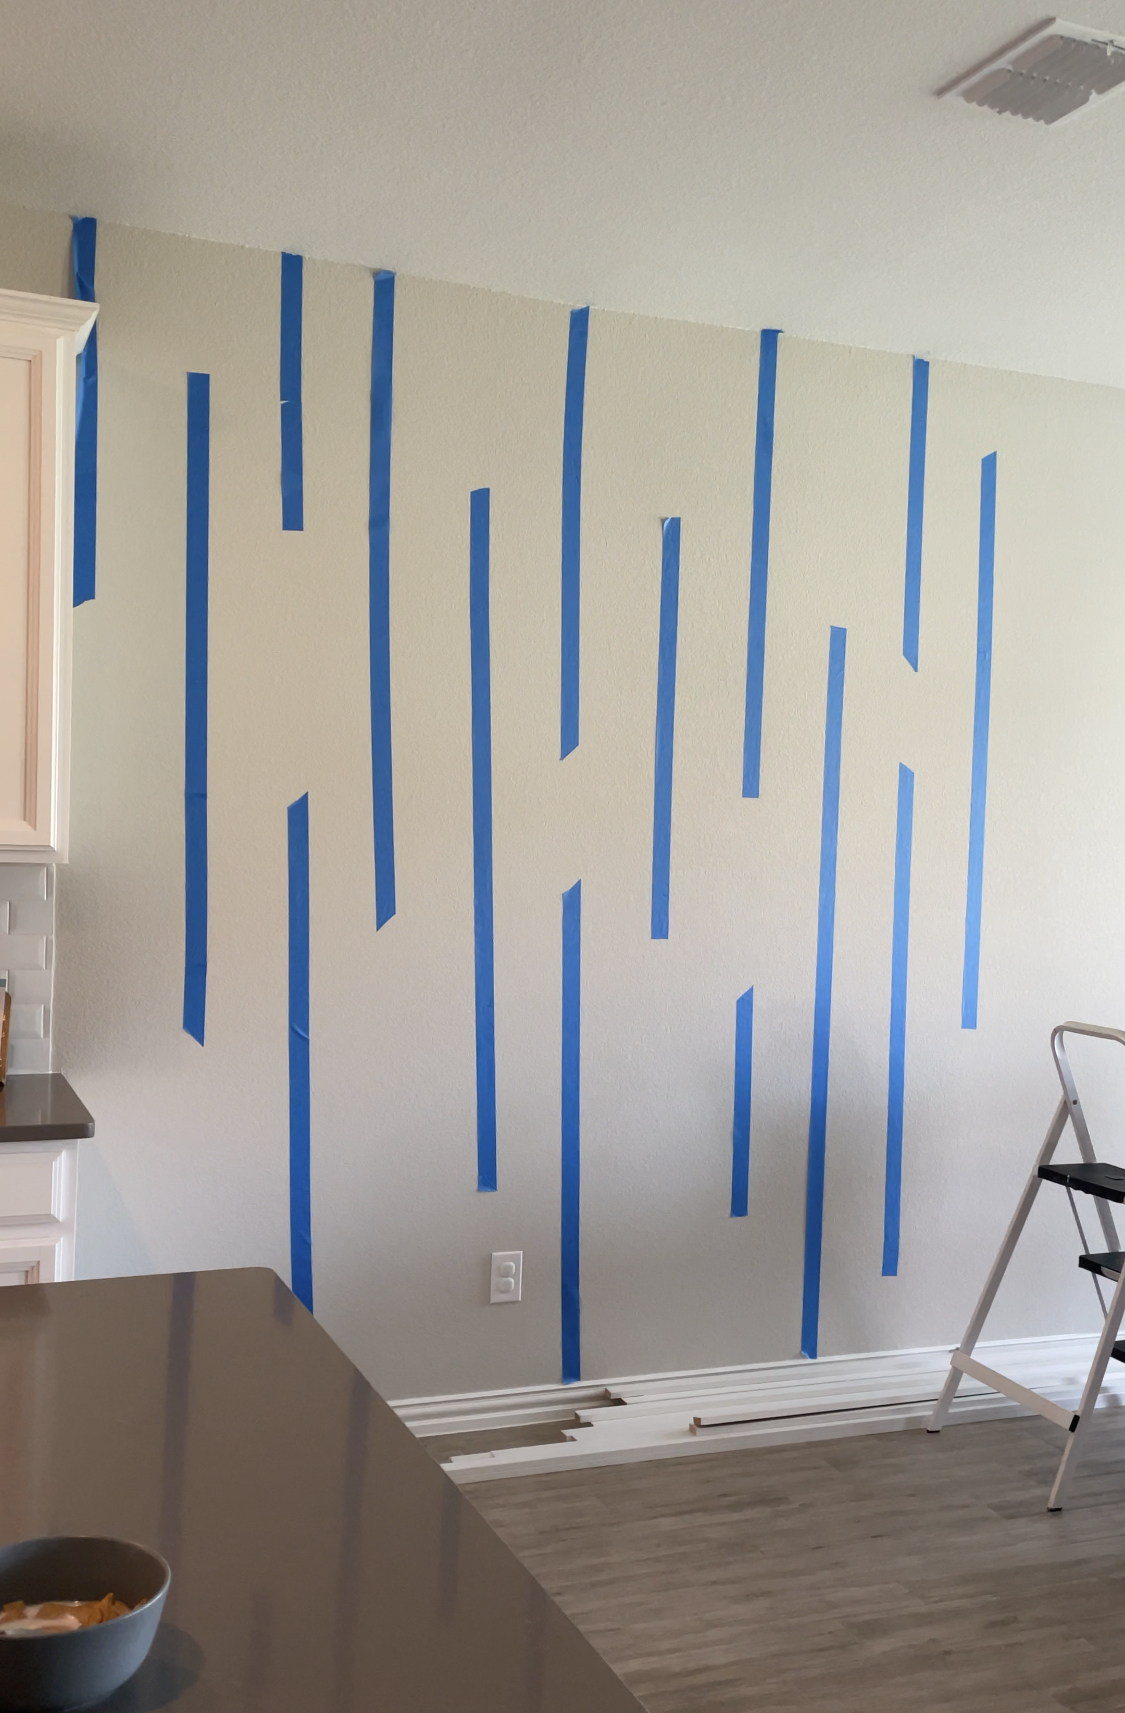
This is what caused me to have to redesign the wall. Originally I had planned to do a mid-century accent wall with strips of MDF board running at various lengths vertically down the wall. However, after the error I made with the hardboard, I had to cover the areas where two pieces of hardboard came together in order to hide my mistake. I made a mockup with painters tape of the new design and after some coaching by my husband on how to use the miter saw (and not cut my fingers off), I set off to start cutting the MDF strips.
Hanging MDF Strips
Reconfigured Design
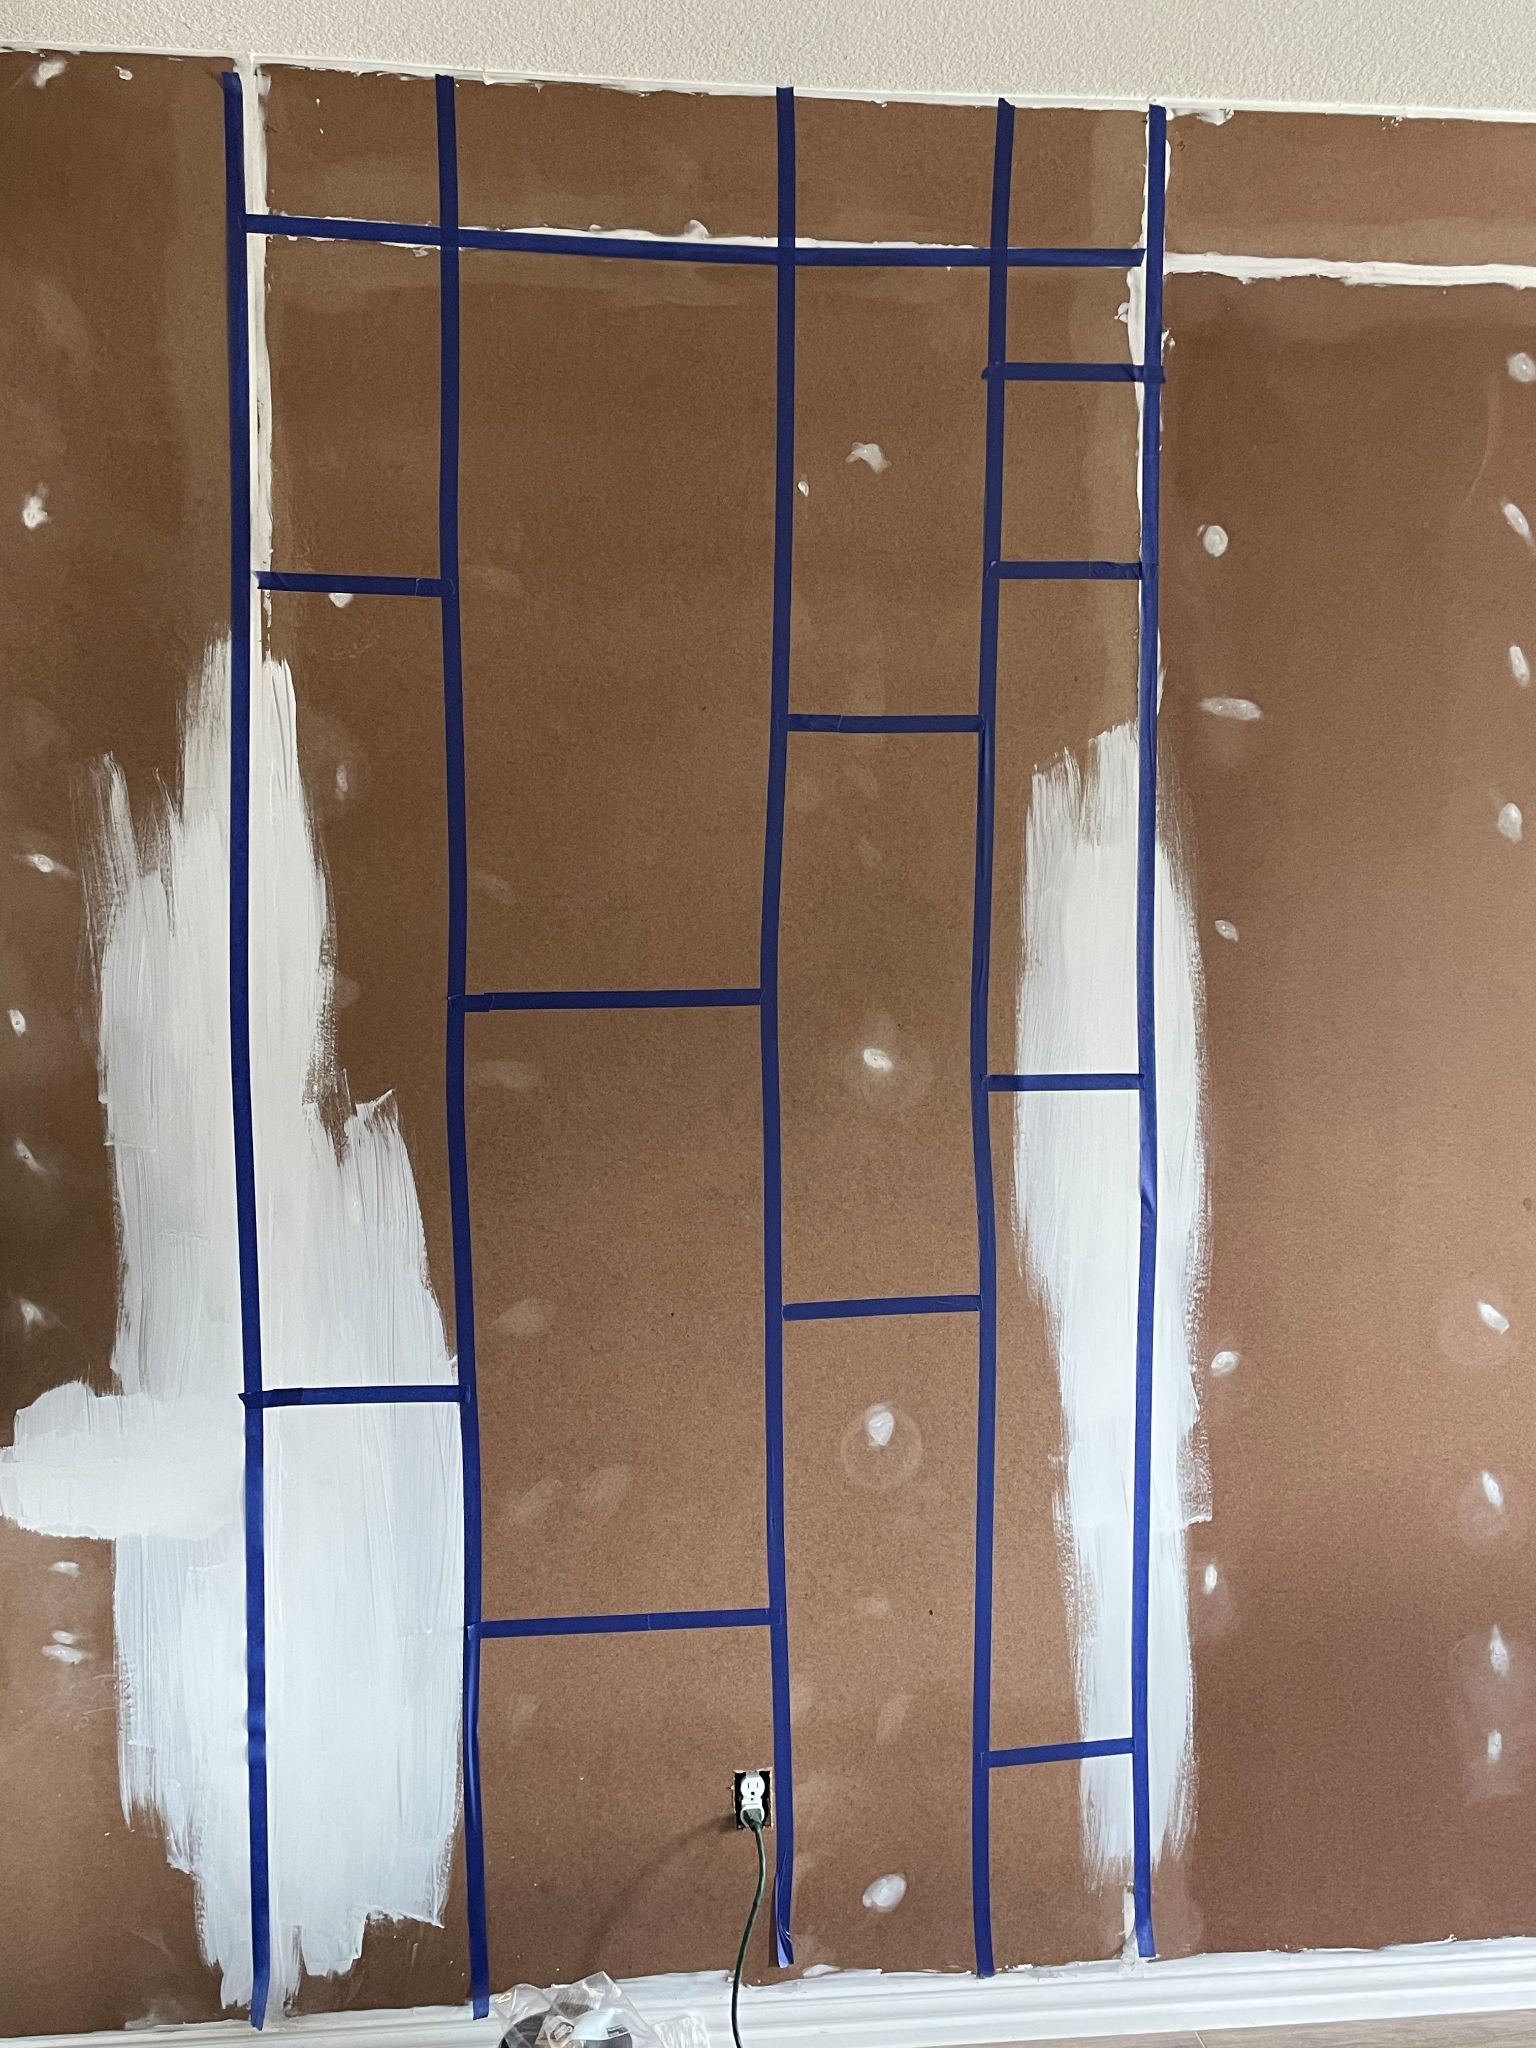
I first put up the vertical and horizontal MDF strips on the places where two hardboard pieces came together to cover the seams. Once I framed everything out, I began cutting and hanging the MDF strips inside each rectangle.

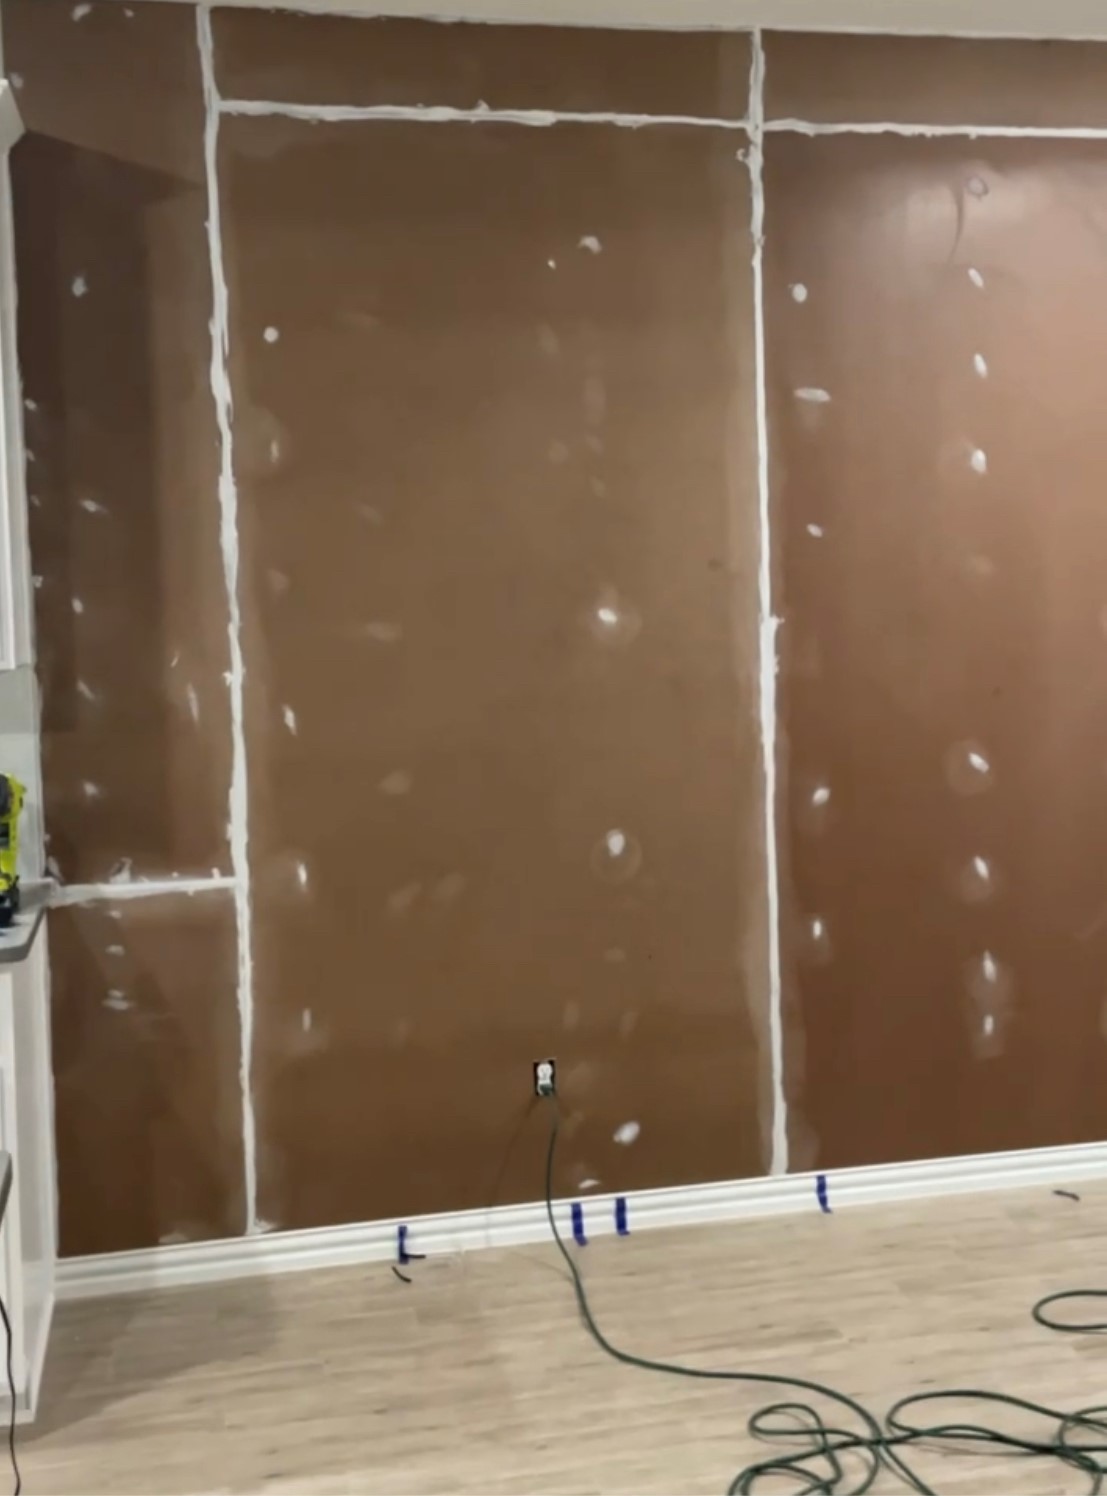
Filling Nail Holes
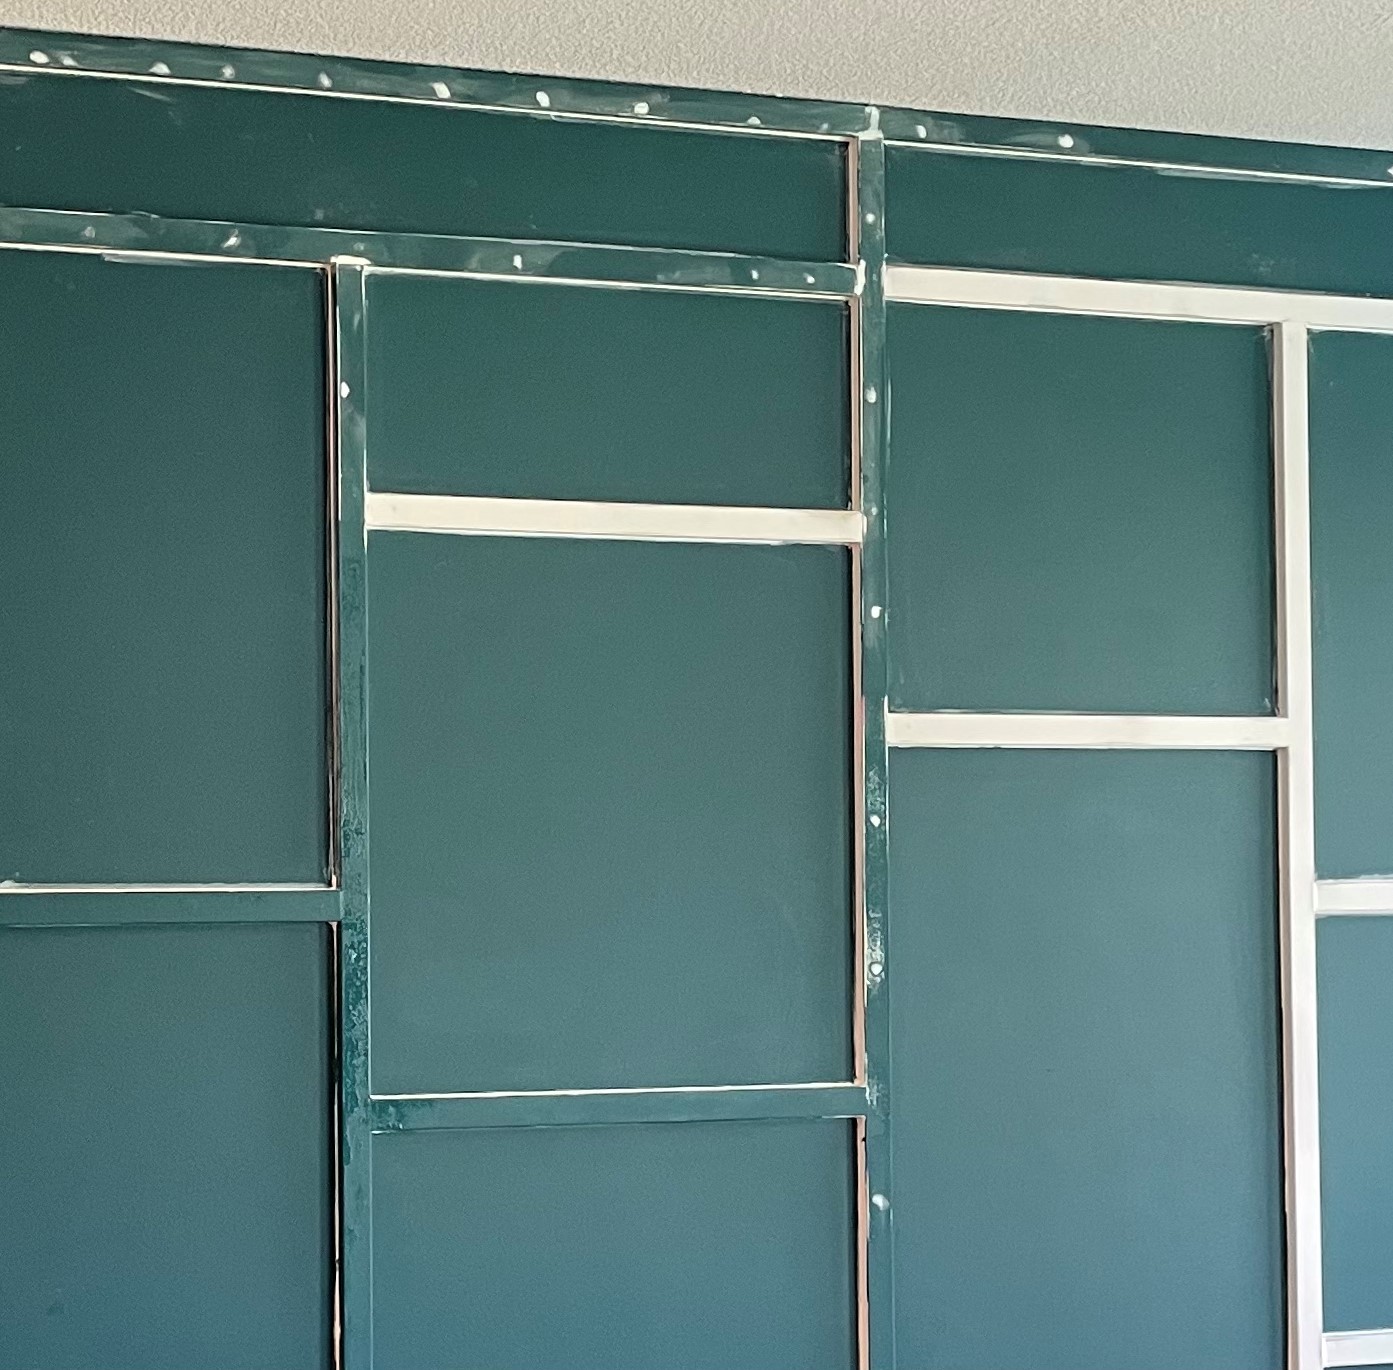
The next thing I had to do once all the MDF strips were mounted to the wall was to fill in the nail holes and seams where any two MDF strips came together with joint compound. Once the joint compound was dry, I was able to sand it down. In some places it took more than one coat of the sanded down joint compound in order to fill the crack between the two MDF strips. However, once all of the seams were filled I was shocked with how flawless everything looked. It was definitely this step that was the most tedious and required the greatest amount of patience.
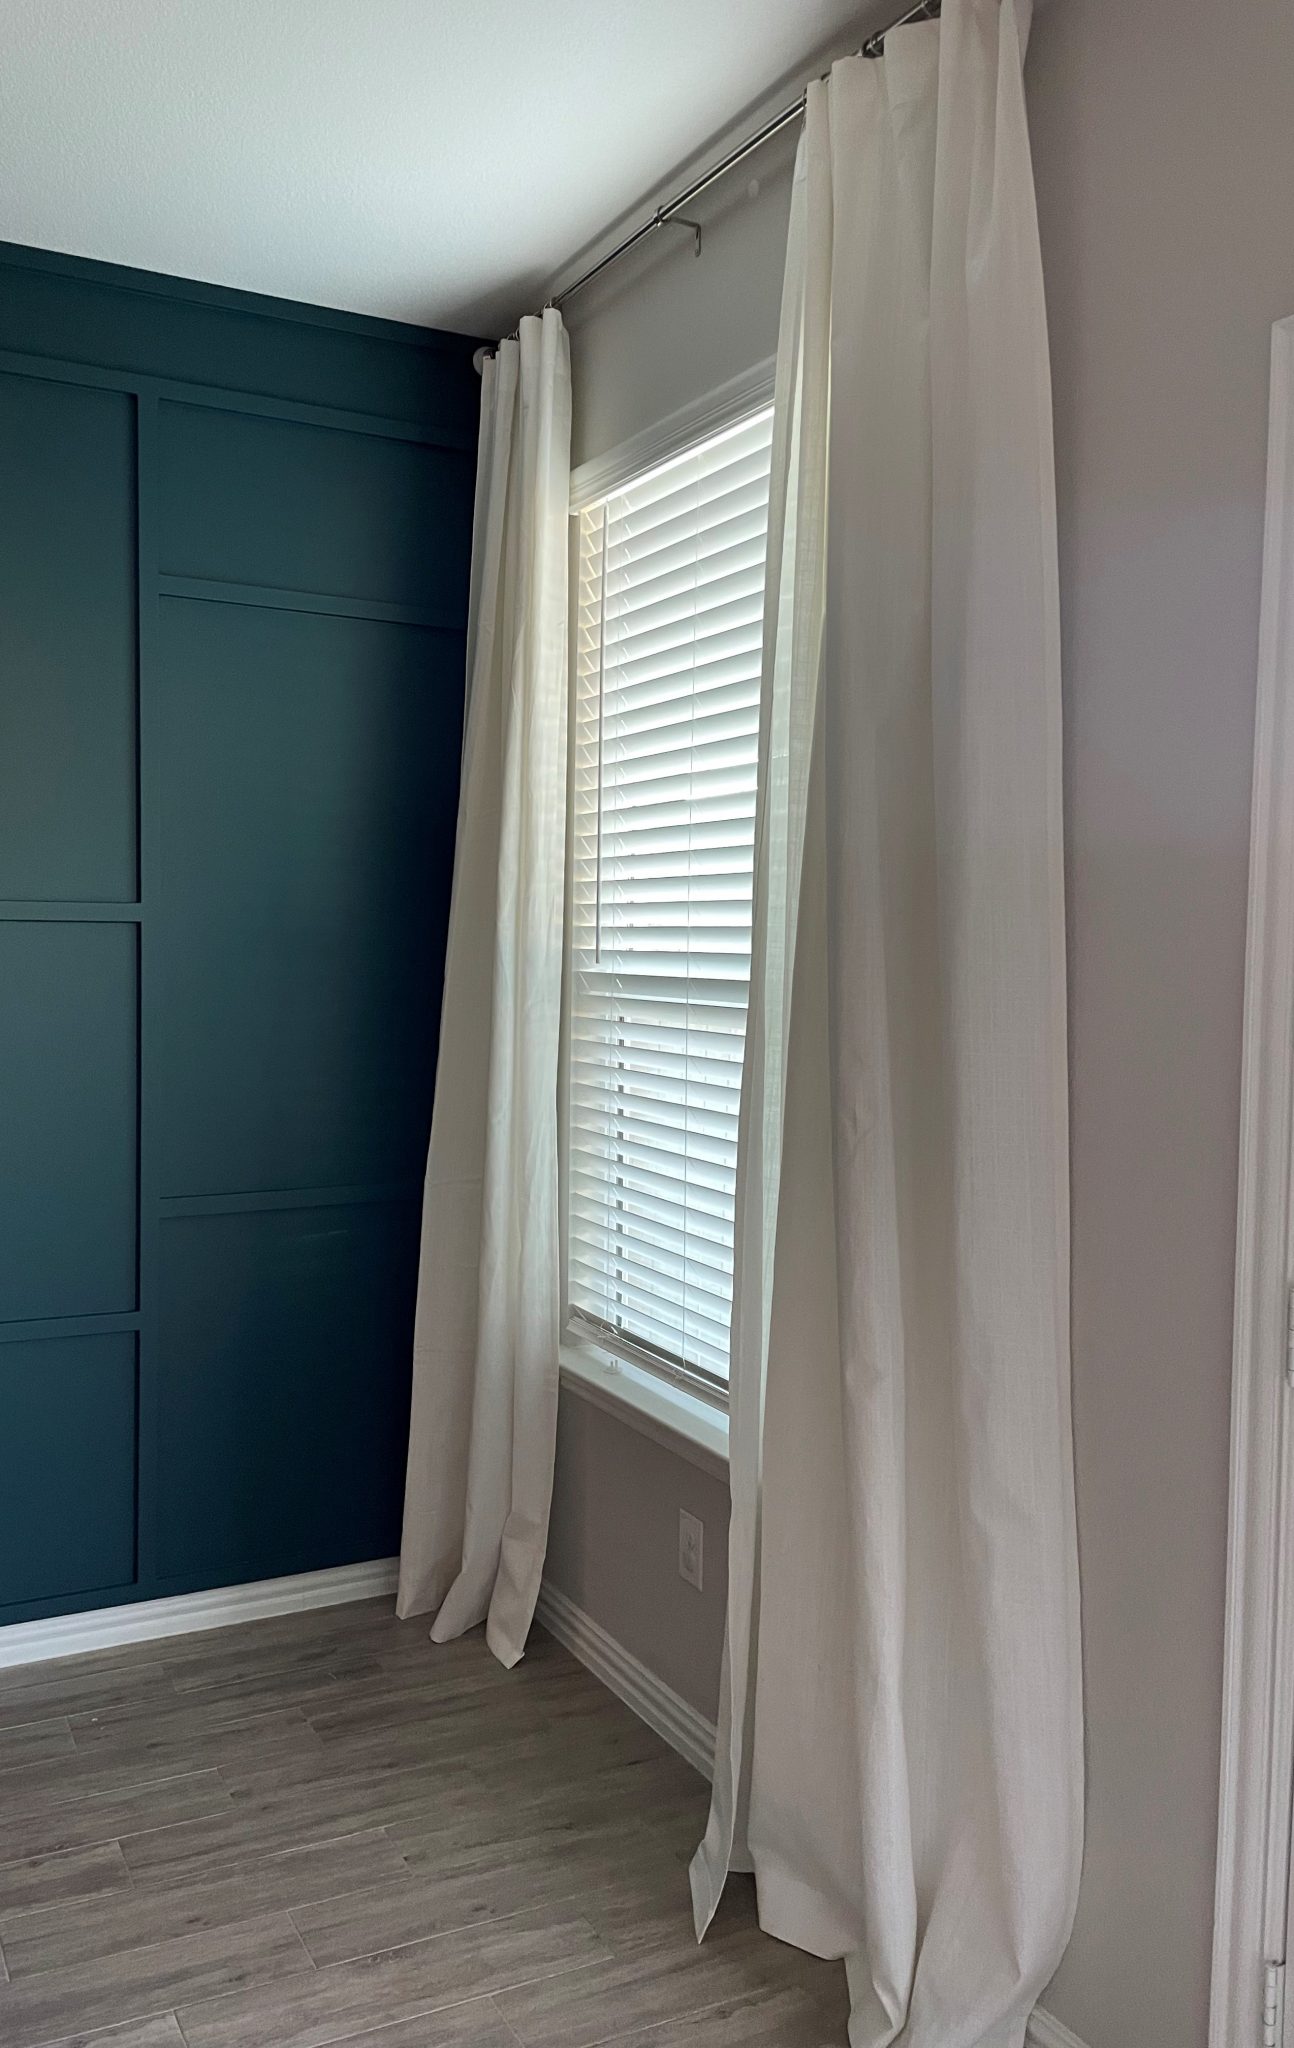
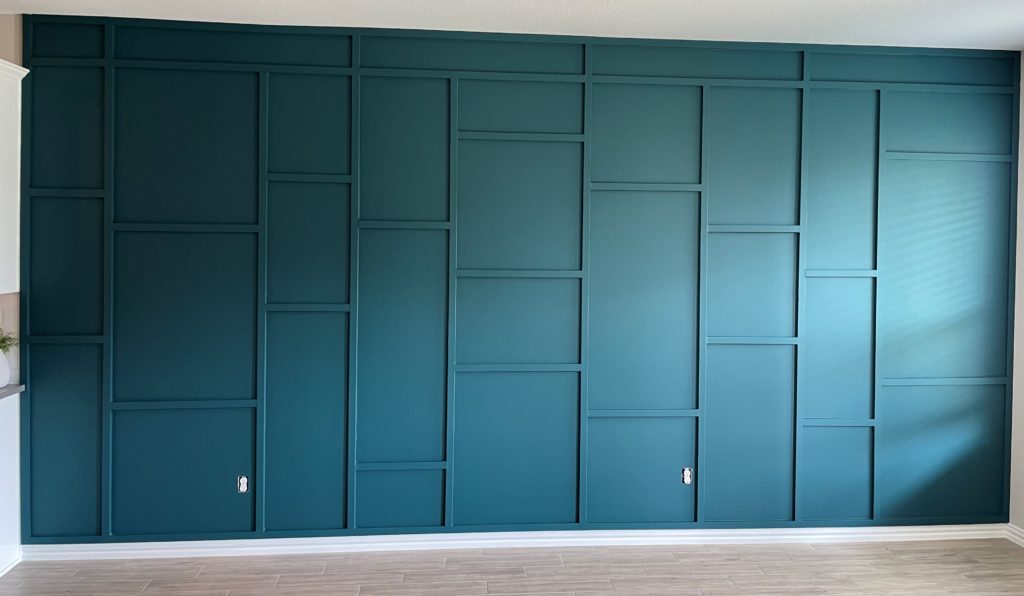
Painting the Board and Batten Wall
The final step was to paint the wall. I can’t even begin to tell you how many different paint samples I looked at before deciding on this color. I knew I wanted a moody green/blue that favored a bit more of the green (in most lighting). Traditionally I have always gone with either a Sherwin Williams or Behr paint selection but I couldn’t find a color from either brand that I loved. After scouring the internet I came across three different Magnolia Homes paint colors: Beautiful Acres, Weekend, and Water Garden. After looking at all three colors in multiple types of lighting I decided that the Weekend color was everything I wanted. I am always a bit nervous to try a new type of paint and this was such a massive project that I decided to go with a brand of paint that I already trusted and had Home Depot color match the Weekend color in the Behr scuff defense paint.
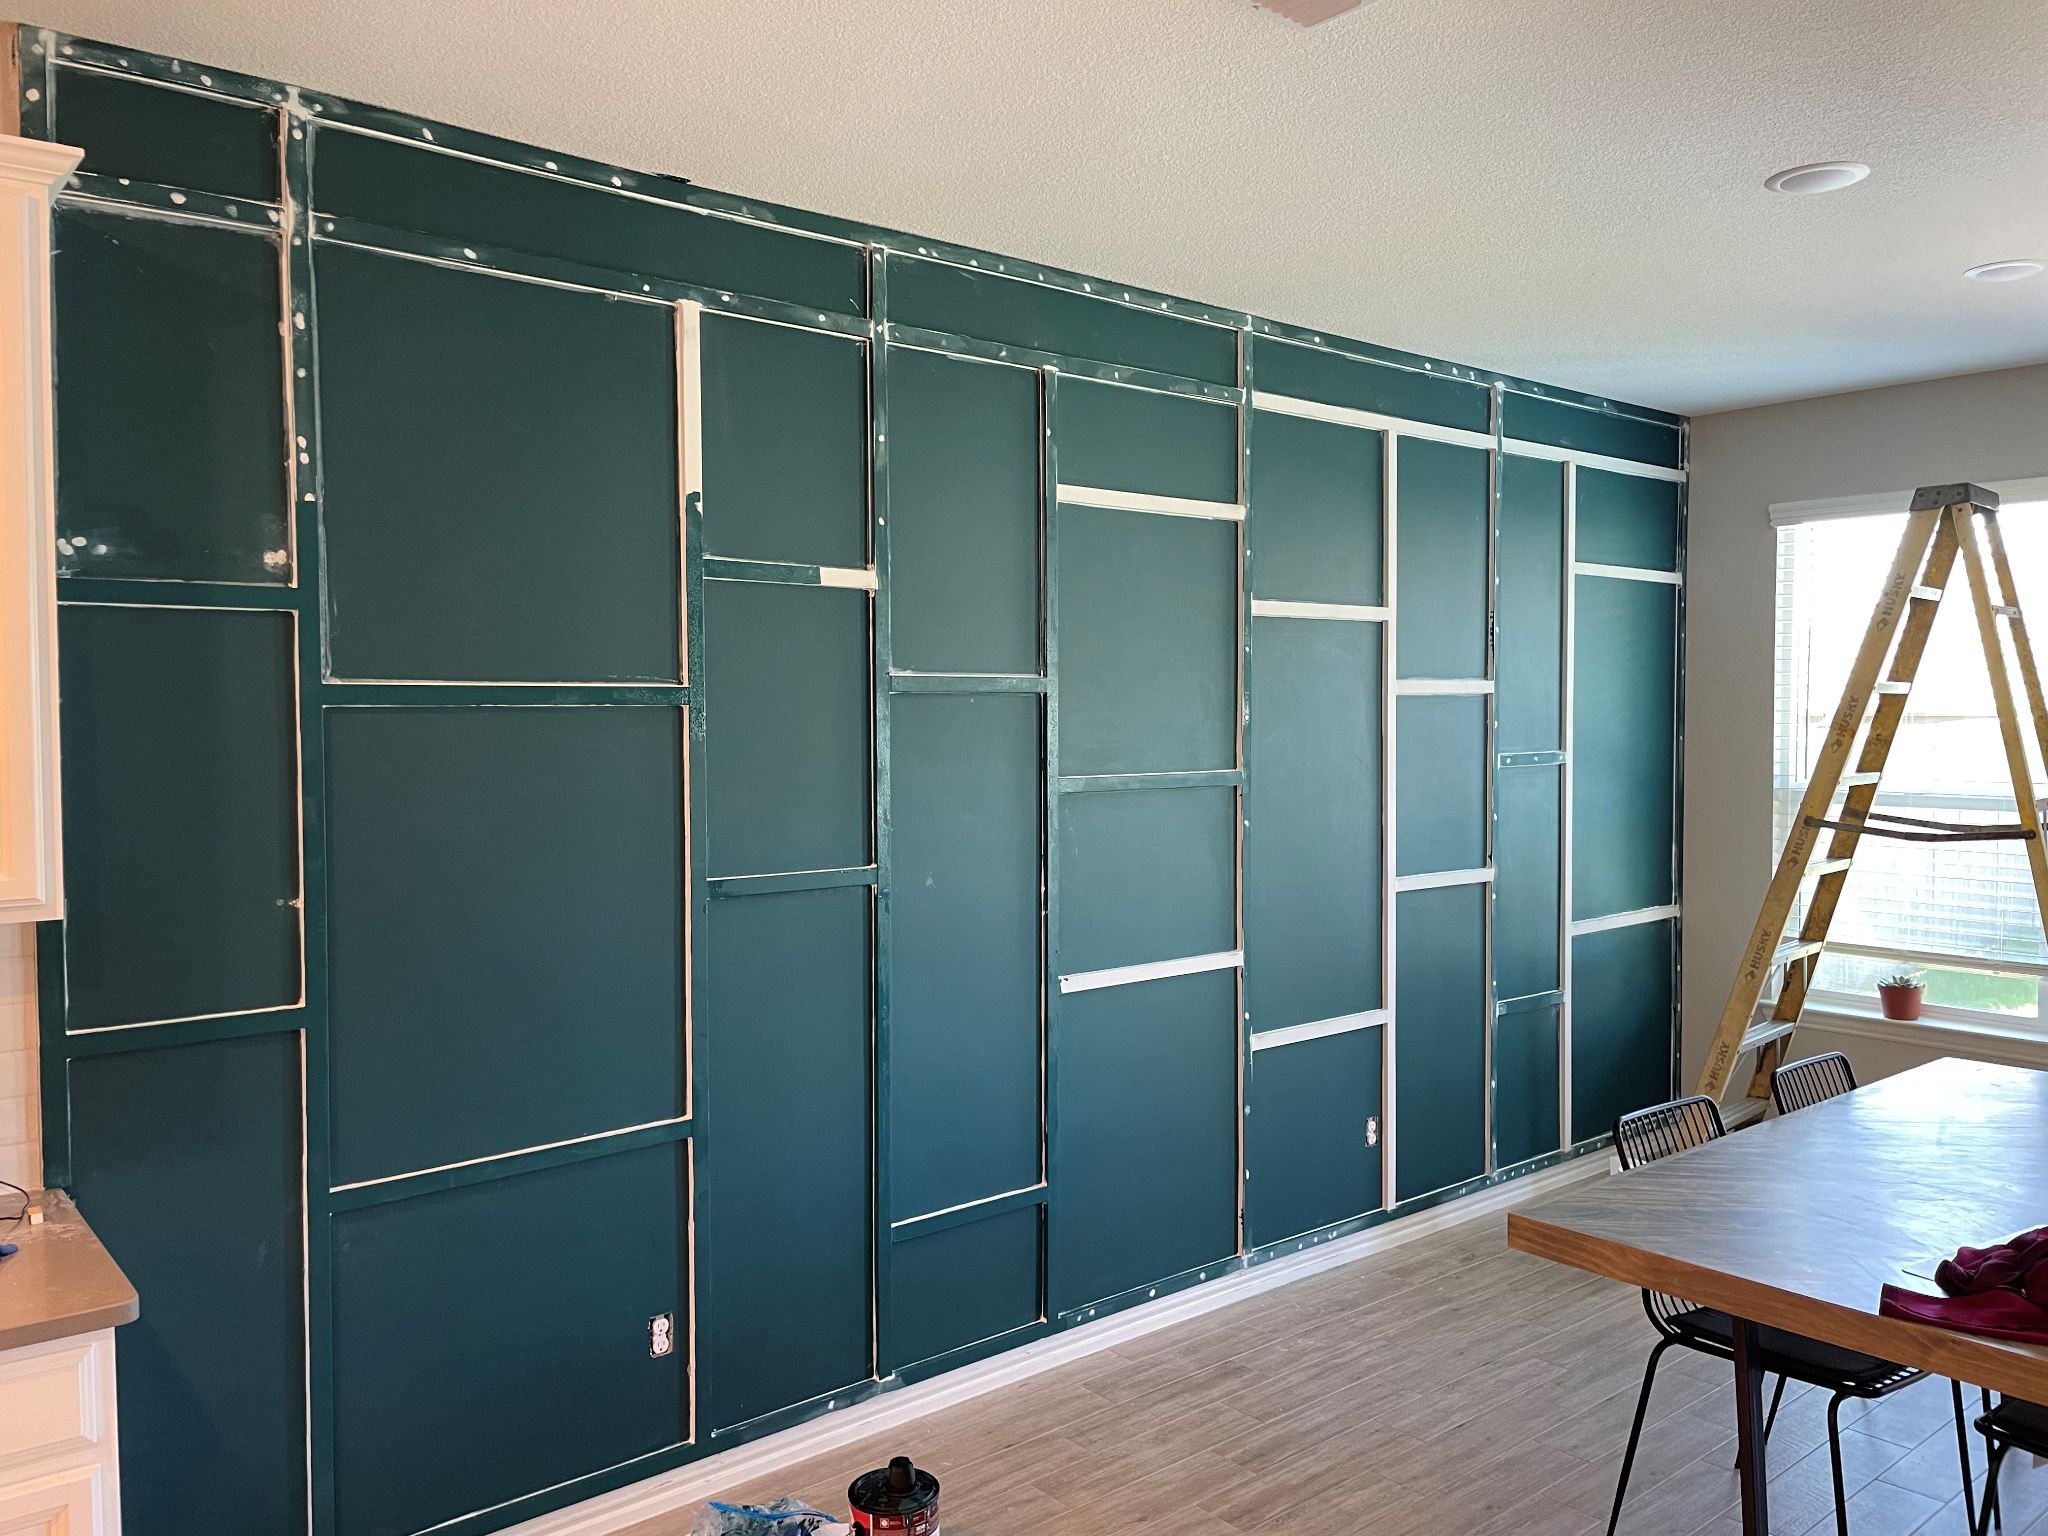
Painting is always my favorite part of the project. It’s at this stage where you can finally see all of the hard work pay off. It is like breathing life into the project. I had attempted to paint individual MDF strips before mounting them on the wall thinking that I would be saving myself time but I stopped ½ through when I realized this was actually adding to the overall project length by creating another step since I would have to repaint after nail holes were filled. I had also painted the hardboard before hanging up any individual MDF strips thinking this would save time as well but dust became a big issue when I sanded down the joint compound after filling all the holes and gaps and I ended up repainting the entire thing. I recommend saving the painting step for last.
Xoxo Megan
Tools I used:
Materials List:
- 1 1/2 in brad nails for hardboard
- 2 in brad nails for MDF trim pieces
- Construction Adhesive
- Silicone Caulk
- Nail Hole Filler
- Caulk Gun
- Hardboard
- MDF Strips
- Sanding Blocks
Paint Used:
- Kilz Primer – 1 Gallon
- Behr Scuff Defense Paint – 1 Gallon (Have Home Depot mix in the color of your choosing!)
- Paint Brush
- Tele-roller Handle
- Roller Cover
- Paint Tray
- Paint Cup
- Plastic Sheeting
- Painters Tape
Step by Step:
1. Use a stud finder to identify where the studs are located in order to attach the hardboard directly into a stud. I marked the baseboards with painters tape to indicate where the studs run vertically.
2. Hang hardboard. To hang hardboard load the construction adhesive into the caulk gun and apply in an S like fashion. Nail the board up to the wall using 1 ½ in brad nails.
3. Fill seams on the hardboard with joint compound. Sand joint compound once dried and apply a second coat as needed.
4. Hang MDF trim to make the border. Apply construction adhesive on the back of the strip (I used a few quarter size dots of adhesive spaced by about 4 inches down the back of the strip. Then nail the strip to the wall using 2 in brad nails.
5. Mock up design with painters tape.
6. Cut MDF boards with a miter saw (while it took longer I knew I had a limited number of MDF strips to work with and was worried that I would mess up so I cut and hung one board at a time).
7. Hang MDF boards using construction adhesive applied to the back in small quarter size dots (I spaced the dots approximately 4in apart). Then use 2in brad nails to fasten to the wall.
PRO TIP: If any excess construction adhesive bleeds out around the MDF board, wipe up immediately with a baby wipe otherwise it will dry and be next to impossible to chip off later.
8. Fill all nail holes and seams where two pieces of MDF board come together with joint compound. Once dried, sand down and apply a second coat as needed (This step takes a while. Patience is key.)
9. Paint the board and batten wall! If you made it to this step congratulations! You did it!